
Exercises (1882)
Lowering and raising one leg in shoulder position
Power
Partner work
1 trainee & 1 helper ► Note change of position
(= double the time required; for lesson planner see Organisation Kraft: Info button Execution)


Practitioner: Shoulder position and arms at the side of the body. Slow down the leg dropped by the partner as quickly as possible and bring it back up to the starting position.
Partner: Stand upright and hold the active participant's legs at about hip height. Alternately drop one leg.
Attention:
Always listen to/respond to your partner (adjust intensity). No sagging in the hips (tense position); rest on the shoulder blades and not on the neck.
Lighten:
Just hold the position (without letting go of one leg).
Harden:
Additional weight on the legs.
Variant:
Let go of the leg unknown to the exerciser (not alternating, legs released by the partner in random order).
2 weight cuffs ► Make the exercise more difficult (additional weight)
Sensitisation
Light-Contact
Partner work
Regular change of roles and partners
.
Every person has an individual perception of pain. That's why it's important to find out the right impact hardness with your partner first. During the sensitisation exercises, you learn to trust your partner.
- Participant A: stands still in the boxing position and gives feedback.
- Participant B: attack with punch combinations 1-3, then step back (cover).
- Participant A: stands still in the boxing stance + 1x counter punch
- Participant B: attack with punch combinations 1-3, then step back (defence)
- Participant A: stands still in the boxing stance + 1x counter punch and step back (defence)
- Participant B: Attack with punch combinations 1-3, then step back (cover) plus counterattack (step forward)
- Participant A: Punch with lead hand to head
- Participant B: Dodges and strikes with lead hand to stomach region
Recognising punch hardness in Light Contact Boxing:
Feedback from opponent (feel), facial expressions (see), punch (hear).
Participant:
1 pair of boxing gloves
Sensitisation (for advanced users)
Light-Contact
Partner work
Role change after one round and partner change after two rounds
.
Fight 1 vs. 1, whereby the participants are assigned the following tasks:
- Participant A: attack with combo, block, counterattack
- Participant B: block, counterattack, block
Before the fight begins, participant A stands in front of the mat and begins to execute as many punches as possible against the mat on the command "box". The subsequent fight thus begins for him in a fatigued state (fatigue inhibits punching hardness).
1 minute of mat punching + 1 minute of fighting = 1 round (per person)
Each participant should complete 3-4 rounds.
Variant:
Both participants punch the mat at the same time before they start fighting each other (both participants in a fatigued state).
1 soft mat (large)
1 stopwatch
Participant:
1 pair of boxing gloves
Sensitisation: Level 1
Light-Contact
Partner work


From a standing position, touch (an immobile target) in a controlled manner: Participant A puts his hands behind his back, participant B touches him with light blows to the stomach, shoulder and forehead. Participant A tries to keep his eyes open and gives feedback if the blow was too strong or missed.
Participant:
1 pair of boxing gloves
Sensitisation: Level 2
Light-Contact
Partner work


Touch a moving target in a controlled manner from a standing position. Participant A puts his hands behind his back, participant B touches him with light blows to the stomach, shoulder and forehead. A tries to keep his eyes open and gives feedback if the blow was too strong or missed. The distance is constantly readjusted between the individual hits: Participant A takes two steps in any direction after each hit, participant B must follow.
Participant:
1 pair of boxing gloves
Sensitisation: Level 3
Light-Contact
Partner work


Both participants face each other in a boxing position. Competitor B touches his partner on the forehead with light blows. After participant A has felt the hit, he immediately counters by extending his arm in the direction of participant B's forehead. This verifies whether participant B immediately goes back into cover/the defence position after the blow. After some time, swap roles.
Participant:
1 pair of boxing gloves
Sensitisation: Level 4
Light-Contact
Partner work


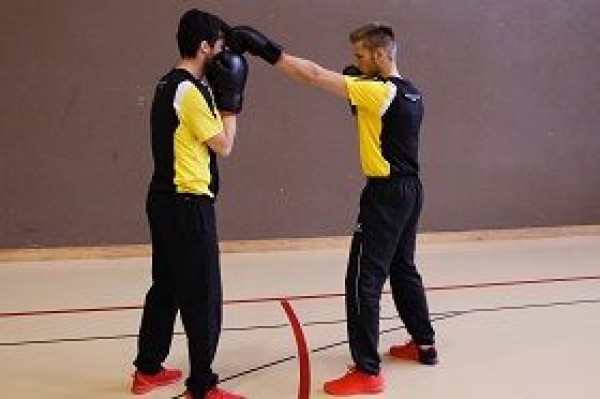

Two punches are connected fluently: From a standing position, competitor B tries to connect two punches fluently and touch his opponent with both. After the series of punches, competitor A counters by taking one or two steps.
Participant:
1 pair of boxing gloves
Sensitisation: Level 5
Light-Contact
Partner work


Multiple punches on a moving target: Participant A holds their hands in the basic position and moves slowly and constantly in all directions, but does not actively defend. Participant B tries to touch his opponent as often as possible in succession and connect several punches. From time to time (e.g. after approx. 8 hits), participant A counters to check whether participant B is covered. After some time, the roles are switched.
Participant:
1 pair of boxing gloves
Sensitisation: Level 6
Light-Contact
Partner work

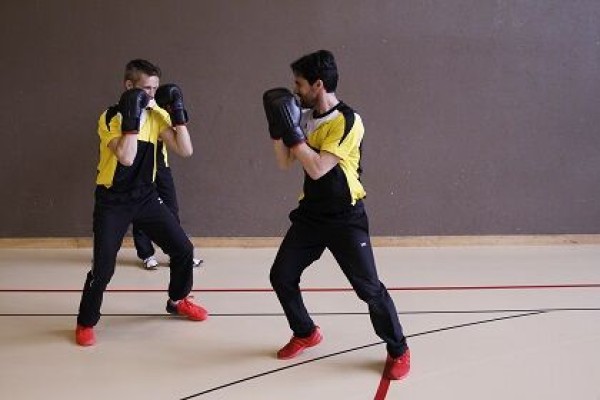
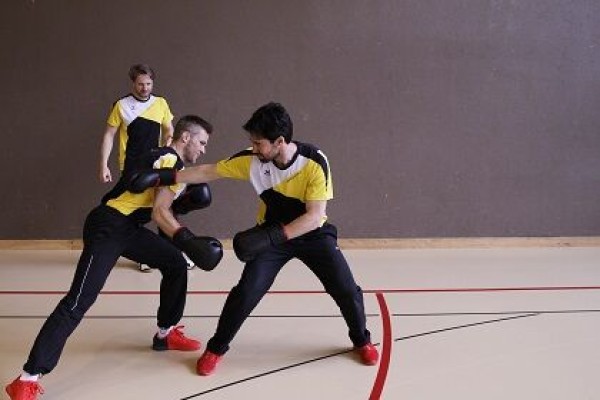
Adjust the distance to a fast-moving target and control the (punch) hardness: Participant A is constantly on the move and tries to dodge the punches from participant B using footwork. The defender gives feedback if the punch was too strong. After some time, the roles are switched.
Participant:
1 pair of boxing gloves
Sinking raft
Fighting and roughhousing games
Group work
3-5 participants
Multiple participants try to push themselves off the large soft mat(s). The participant who remains wins. Only pushing and pulling the opponent is allowed.
1-2 soft mats (large)
x soft mats (small)
Post structure:
For safety reasons (protection), small soft mats are placed around the large soft mats.
Cross-country ski ergometer
Power
Individual work

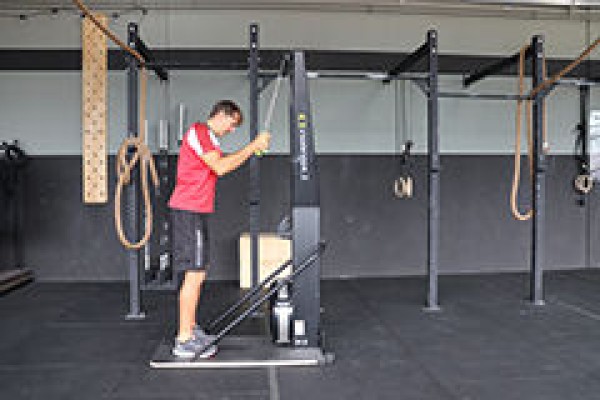
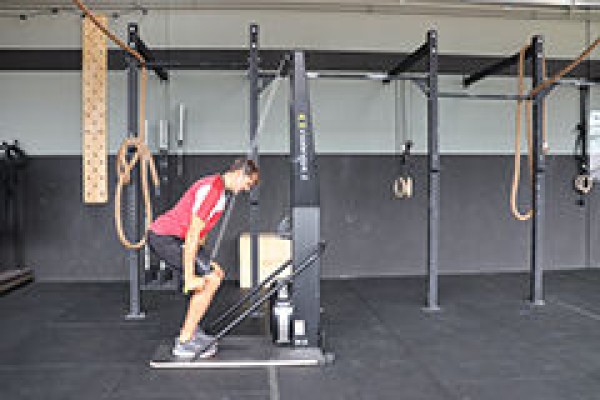


Working with the cross-country ski ergometer does not require any prior knowledge of winter sports, the technique is beginner-friendly and quick to learn. However, there are a few points to bear in mind: Firstly, stand with your feet slightly more than shoulder-width apart (how close you stand to the device is a matter of taste, although taller people usually prefer a greater distance in order to achieve a full arm extension at the starting point and therefore ultimately a longer stroke). The hands should also be just outside the shoulders when gripping the handles. As the handles of the device are attached to freely movable hinges, you can easily rotate them to your optimum position. The edges of the hand, including the little finger, should be placed on the thickened end of the handle, allowing more pressure to be applied. At the beginning of the pull, the entire body is stretched, only the arms remain slightly bent, the handles are now pulled downwards at an angle until the hands are just below the knees (a V-shaped curve, where the hands move sideways away from the body, is avoided). At the lowest point, the elbows are fully extended while the knees are minimally bent (comparable to the starting position of a jump). In the return phase, the body straightens up again completely, synchronised with the backswing of the arms. Lifting your heels off the ground is perfectly fine, especially at higher speeds.
Attention:
Do not turn every repetition into a squat, as this will tire your legs too quickly. Take a deep breath before each pull on the machine and keep the abdominal muscles under constant tension.
Lighten/Harden:
The intensity is controlled by adjusting the air valve. The higher the lever is moved on the scale (1-10), the wider the flap opens and the more air can flow into the bike. More air means more resistance in the initial phase of the pull (comparable to a higher pedalling resistance in the higher gears on a bicycle). It is important to find a setting at which a continuous and controlled pressure can be maintained. If the setting is too high, the air resistance initially has to be overcome with an excessively strong pull and the remaining range of motion "runs into nothing", which is a waste of energy. If you pay attention to the background noise, you will get a suitable indicator: the aim should be to achieve the smoothest possible whirring with only slight peaks in the initial phase of the pull. Most exercisers tend to over-optimise the resistance setting. As is so often the case, less is more; levels 6-7 work well for men and 4-6 for women, with exceptions for particularly heavy and strong athletes.
Variant:
The double pole technique is usually used for training, which means that both arms work in synchronisation with each other. The diagonal technique, in which the arms are used alternately, is less common but can be used as a variation. It achieves lower speeds than the simultaneous use of the arms, but is certainly suitable as an occasional training stimulus, which above all creates a healthy rotation of the spine and a strain on the lateral trunk muscles. The diagonal technique can also correct imbalances in unevenly developed back and arm muscles (e.g. after injuries).
1 cross-country ski ergometer
Skilanglauf-Ergometer (m: 1000m/1km - 80kal; w: 800m - 60kal)
Power
Individual work


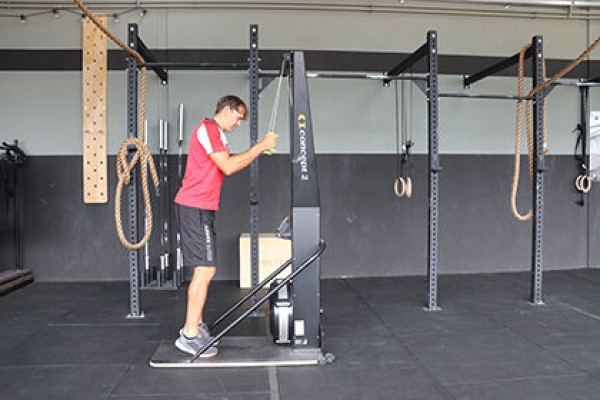


Working with the cross-country ski ergometer does not require any prior knowledge of winter sports, the technique is beginner-friendly and quick to learn. However, there are a few points to bear in mind: Firstly, stand with your feet slightly more than shoulder-width apart (how close you stand to the device is a matter of taste, although taller people usually prefer a greater distance in order to achieve a full arm extension at the starting point and therefore ultimately a longer stroke). The hands should also be just outside the shoulders when gripping the handles. As the handles of the device are attached to freely movable hinges, you can easily rotate them to your optimum position. The edges of the hand, including the little finger, should be placed on the thickened end of the handle, allowing more pressure to be applied. At the beginning of the pull, the entire body is stretched, only the arms remain slightly bent, the handles are now pulled downwards at an angle until the hands are just below the knees (a V-shaped curve, where the hands move sideways away from the body, is avoided). At the lowest point, the elbows are fully extended while the knees are minimally bent (comparable to the starting position of a jump). In the return phase, the body straightens up again completely, synchronised with the backswing of the arms. Lifting your heels off the ground is perfectly fine, especially at higher speeds.
Attention:
Do not turn every repetition into a squat, as this will tire your legs too quickly. Take a deep breath before each pull on the machine and keep the abdominal muscles under constant tension.
Lighten/Harden:
The intensity is controlled by adjusting the air valve. The higher the lever is moved on the scale (1-10), the wider the flap opens and the more air can flow into the bike. More air means more resistance in the initial phase of the pull (comparable to a higher pedalling resistance in the higher gears on a bicycle). It is important to find a setting at which a continuous and controlled pressure can be maintained. If the setting is too high, the air resistance initially has to be overcome with an excessively strong pull and the remaining range of motion "runs into nothing", which is a waste of energy. If you pay attention to the background noise, you will get a suitable indicator: the aim should be to achieve the smoothest possible whirring with only slight peaks in the initial phase of the pull. Most exercisers tend to over-optimise the resistance setting. As is so often the case, less is more; levels 6-7 work well for men and 4-6 for women, with exceptions for particularly heavy and strong athletes.
Variant:
The double pole technique is usually used for training, which means that both arms work in synchronisation with each other. The diagonal technique, in which the arms are used alternately, is less common but can be used as a variation. It achieves lower speeds than the simultaneous use of the arms, but is certainly suitable as an occasional training stimulus, which above all creates a healthy rotation of the spine and a strain on the lateral trunk muscles. The diagonal technique can also correct imbalances in unevenly developed back and arm muscles (e.g. after injuries).
1 cross-country ski ergometer
Skilanglauf-Ergometer (m: 1250m/1.25km - 100kal; w: 1000m/1km - 75kal)
Power
Individual work


Working with the cross-country ski ergometer does not require any prior knowledge of winter sports, the technique is beginner-friendly and quick to learn. However, there are a few points to bear in mind: Firstly, stand with your feet slightly more than shoulder-width apart (how close you stand to the device is a matter of taste, although taller people usually prefer a greater distance in order to achieve a full arm extension at the starting point and therefore ultimately a longer stroke). The hands should also be just outside the shoulders when gripping the handles. As the handles of the device are attached to freely movable hinges, you can easily rotate them to your optimum position. The edges of the hand, including the little finger, should be placed on the thickened end of the handle, allowing more pressure to be applied. At the beginning of the pull, the entire body is stretched, only the arms remain slightly bent, the handles are now pulled downwards at an angle until the hands are just below the knees (a V-shaped curve, where the hands move sideways away from the body, is avoided). At the lowest point, the elbows are fully extended while the knees are minimally bent (comparable to the starting position of a jump). In the return phase, the body straightens up again completely, synchronised with the backswing of the arms. Lifting your heels off the ground is perfectly fine, especially at higher speeds.
Attention:
Do not turn every repetition into a squat, as this will tire your legs too quickly. Take a deep breath before each pull on the machine and keep the abdominal muscles under constant tension.
Lighten/Harden:
The intensity is controlled by adjusting the air valve. The higher the lever is moved on the scale (1-10), the wider the flap opens and the more air can flow into the bike. More air means more resistance in the initial phase of the pull (comparable to a higher pedalling resistance in the higher gears on a bicycle). It is important to find a setting at which a continuous and controlled pressure can be maintained. If the setting is too high, the air resistance initially has to be overcome with an excessively strong pull and the remaining range of motion "runs into nothing", which is a waste of energy. If you pay attention to the background noise, you will get a suitable indicator: the aim should be to achieve the smoothest possible whirring with only slight peaks in the initial phase of the pull. Most exercisers tend to over-optimise the resistance setting. As is so often the case, less is more; levels 6-7 work well for men and 4-6 for women, with exceptions for particularly heavy and strong athletes.
Variant:
The double pole technique is usually used for training, which means that both arms work in synchronisation with each other. The diagonal technique, in which the arms are used alternately, is less common but can be used as a variation. It achieves lower speeds than the simultaneous use of the arms, but is certainly suitable as an occasional training stimulus, which above all creates a healthy rotation of the spine and a strain on the lateral trunk muscles. The diagonal technique can also correct imbalances in unevenly developed back and arm muscles (e.g. after injuries).
1 cross-country ski ergometer
Cross-country ergometer (m: 125m - 10cal; w: 100m - 7cal)
Power
Individual work
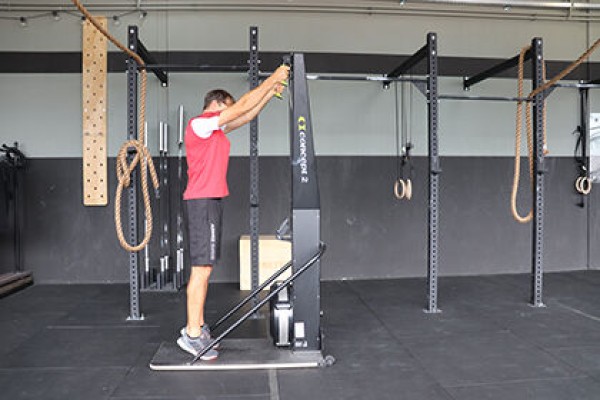


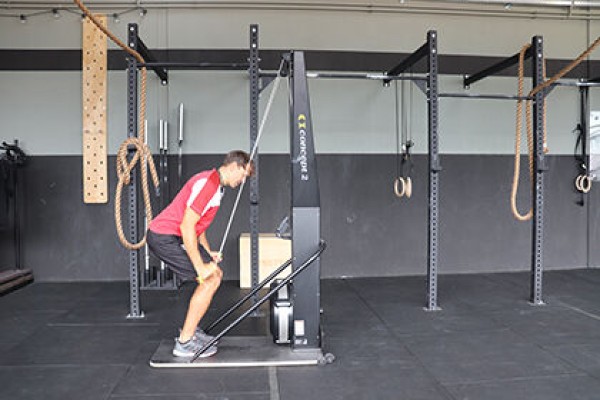


Working with the cross-country ski ergometer does not require any prior knowledge of winter sports, the technique is beginner-friendly and quick to learn. However, there are a few points to bear in mind: Firstly, stand with your feet slightly more than shoulder-width apart (how close you stand to the device is a matter of taste, although taller people usually prefer a greater distance in order to achieve a full arm extension at the starting point and therefore ultimately a longer stroke). The hands should also be just outside the shoulders when gripping the handles. As the handles of the device are attached to freely movable hinges, you can easily rotate them to your optimum position. The edges of the hand, including the little finger, should be placed on the thickened end of the handle, allowing more pressure to be applied. At the beginning of the pull, the entire body is stretched, only the arms remain slightly bent, the handles are now pulled downwards at an angle until the hands are just below the knees (a V-shaped curve, where the hands move sideways away from the body, is avoided). At the lowest point, the elbows are fully extended while the knees are minimally bent (comparable to the starting position of a jump). In the return phase, the body straightens up again completely, synchronised with the backswing of the arms. Lifting your heels off the ground is perfectly fine, especially at higher speeds.
Attention:
Do not turn every repetition into a squat, as this will tire your legs too quickly. Take a deep breath before each pull on the machine and keep the abdominal muscles under constant tension.
Lighten/Harden:
The intensity is controlled by adjusting the air valve. The higher the lever is moved on the scale (1-10), the wider the flap opens and the more air can flow into the bike. More air means more resistance in the initial phase of the pull (comparable to a higher pedalling resistance in the higher gears on a bicycle). It is important to find a setting at which a continuous and controlled pressure can be maintained. If the setting is too high, the air resistance initially has to be overcome with an excessively strong pull and the remaining range of motion "runs into nothing", which is a waste of energy. If you pay attention to the background noise, you will get a suitable indicator: the aim should be to achieve the smoothest possible whirring with only slight peaks in the initial phase of the pull. Most exercisers tend to over-optimise the resistance setting. As is so often the case, less is more; levels 6-7 work well for men and 4-6 for women, with exceptions for particularly heavy and strong athletes.
Variant:
The double pole technique is usually used for training, which means that both arms work in synchronisation with each other. The diagonal technique, in which the arms are used alternately, is less common but can be used as a variation. It achieves lower speeds than the simultaneous use of the arms, but is certainly suitable as an occasional training stimulus, which above all creates a healthy rotation of the spine and a strain on the lateral trunk muscles. The diagonal technique can also correct imbalances in unevenly developed back and arm muscles (e.g. after injuries).
1 cross-country ski ergometer
Skilanglauf-Ergometer (m: 2000m/2km - 160kal; w: 1600m/1.6km/1 Mile - 120kal)
Power
Individual work

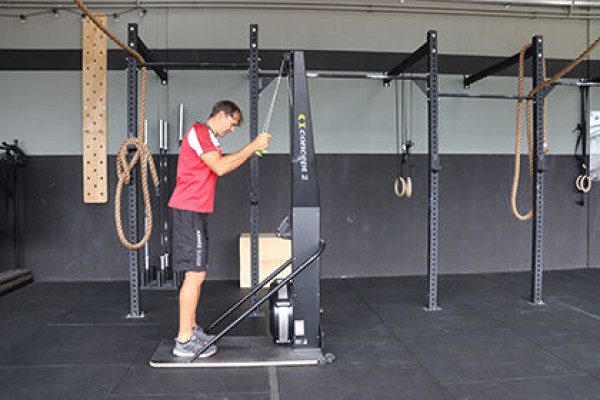
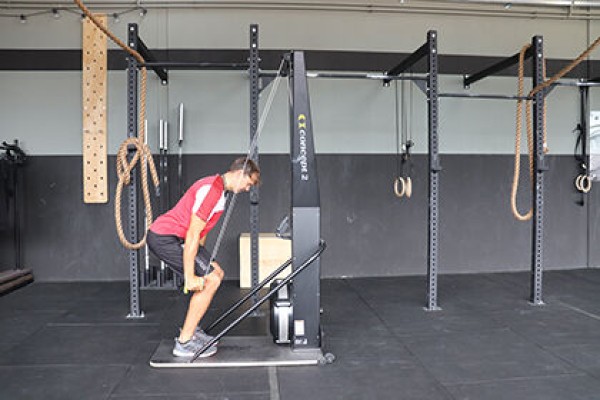


Working with the cross-country ski ergometer does not require any prior knowledge of winter sports, the technique is beginner-friendly and quick to learn. However, there are a few points to bear in mind: Firstly, stand with your feet slightly more than shoulder-width apart (how close you stand to the device is a matter of taste, although taller people usually prefer a greater distance in order to achieve a full arm extension at the starting point and therefore ultimately a longer stroke). The hands should also be just outside the shoulders when gripping the handles. As the handles of the device are attached to freely movable hinges, you can easily rotate them to your optimum position. The edges of the hand, including the little finger, should be placed on the thickened end of the handle, allowing more pressure to be applied. At the beginning of the pull, the entire body is stretched, only the arms remain slightly bent, the handles are now pulled downwards at an angle until the hands are just below the knees (a V-shaped curve, where the hands move sideways away from the body, is avoided). At the lowest point, the elbows are fully extended while the knees are minimally bent (comparable to the starting position of a jump). In the return phase, the body straightens up again completely, synchronised with the backswing of the arms. Lifting your heels off the ground is perfectly fine, especially at higher speeds.
Attention:
Do not turn every repetition into a squat, as this will tire your legs too quickly. Take a deep breath before each pull on the machine and keep the abdominal muscles under constant tension.
Lighten/Harden:
The intensity is controlled by adjusting the air valve. The higher the lever is moved on the scale (1-10), the wider the flap opens and the more air can flow into the bike. More air means more resistance in the initial phase of the pull (comparable to a higher pedalling resistance in the higher gears on a bicycle). It is important to find a setting at which a continuous and controlled pressure can be maintained. If the setting is too high, the air resistance initially has to be overcome with an excessively strong pull and the remaining range of motion "runs into nothing", which is a waste of energy. If you pay attention to the background noise, you will get a suitable indicator: the aim should be to achieve the smoothest possible whirring with only slight peaks in the initial phase of the pull. Most exercisers tend to over-optimise the resistance setting. As is so often the case, less is more; levels 6-7 work well for men and 4-6 for women, with exceptions for particularly heavy and strong athletes.
Variant:
The double pole technique is usually used for training, which means that both arms work in synchronisation with each other. The diagonal technique, in which the arms are used alternately, is less common but can be used as a variation. It achieves lower speeds than the simultaneous use of the arms, but is certainly suitable as an occasional training stimulus, which above all creates a healthy rotation of the spine and a strain on the lateral trunk muscles. The diagonal technique can also correct imbalances in unevenly developed back and arm muscles (e.g. after injuries).
1 cross-country ski ergometer
Cross-country ergometer (m: 200m - 16cal; w: 150m - 12cal)
Power
Individual work

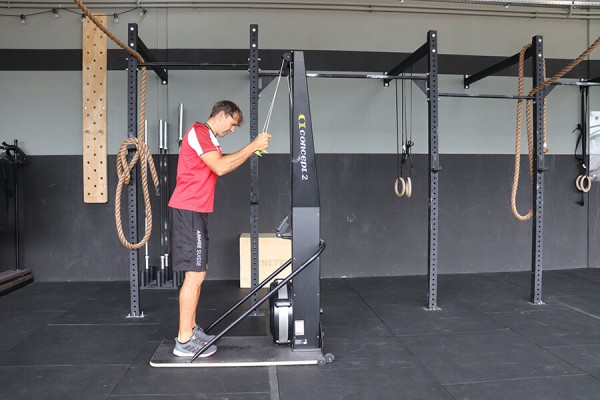

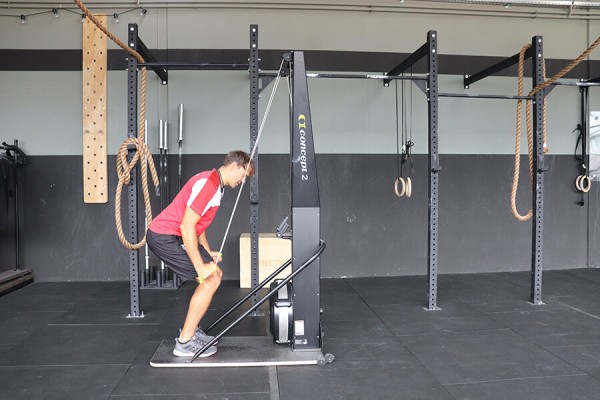
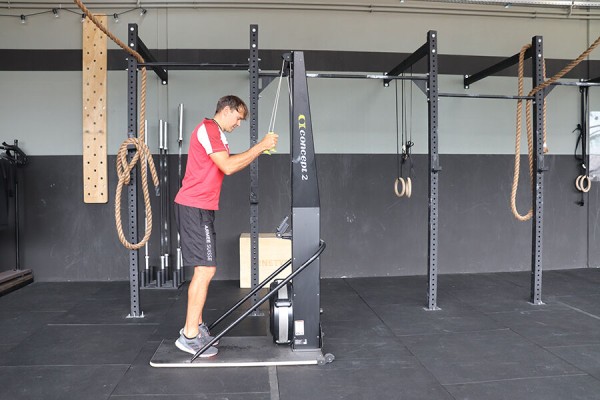

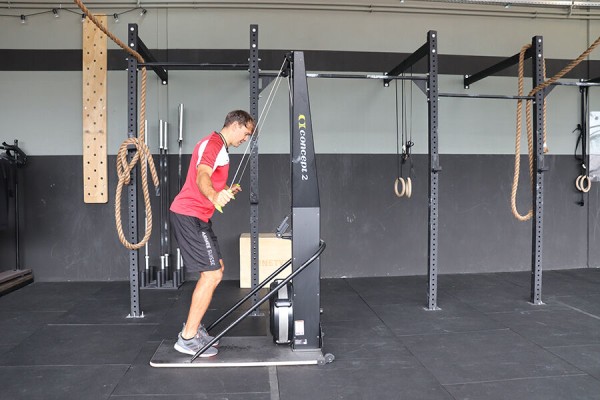

Working with the cross-country ski ergometer does not require any prior knowledge of winter sports, the technique is beginner-friendly and quick to learn. However, there are a few points to bear in mind: Firstly, stand with your feet slightly more than shoulder-width apart (how close you stand to the device is a matter of taste, although taller people usually prefer a greater distance in order to achieve a full arm extension at the starting point and therefore ultimately a longer stroke). The hands should also be just outside the shoulders when gripping the handles. As the handles of the device are attached to freely movable hinges, you can easily rotate them to your optimum position. The edges of the hand, including the little finger, should be placed on the thickened end of the handle, allowing more pressure to be applied. At the beginning of the pull, the entire body is stretched, only the arms remain slightly bent, the handles are now pulled downwards at an angle until the hands are just below the knees (a V-shaped curve, where the hands move sideways away from the body, is avoided). At the lowest point, the elbows are fully extended while the knees are minimally bent (comparable to the starting position of a jump). In the return phase, the body straightens up again completely, synchronised with the backswing of the arms. Lifting your heels off the ground is perfectly fine, especially at higher speeds.
Attention:
Do not turn every repetition into a squat, as this will tire your legs too quickly. Take a deep breath before each pull on the machine and keep the abdominal muscles under constant tension.
Lighten/Harden:
The intensity is controlled by adjusting the air valve. The higher the lever is moved on the scale (1-10), the wider the flap opens and the more air can flow into the bike. More air means more resistance in the initial phase of the pull (comparable to a higher pedalling resistance in the higher gears on a bicycle). It is important to find a setting at which a continuous and controlled pressure can be maintained. If the setting is too high, the air resistance initially has to be overcome with an excessively strong pull and the remaining range of motion "runs into nothing", which is a waste of energy. If you pay attention to the background noise, you will get a suitable indicator: the aim should be to achieve the smoothest possible whirring with only slight peaks in the initial phase of the pull. Most exercisers tend to over-optimise the resistance setting. As is so often the case, less is more; levels 6-7 work well for men and 4-6 for women, with exceptions for particularly heavy and strong athletes.
Variant:
The double pole technique is usually used for training, which means that both arms work in synchronisation with each other. The diagonal technique, in which the arms are used alternately, is less common but can be used as a variation. It achieves lower speeds than the simultaneous use of the arms, but is certainly suitable as an occasional training stimulus, which above all creates a healthy rotation of the spine and a strain on the lateral trunk muscles. The diagonal technique can also correct imbalances in unevenly developed back and arm muscles (e.g. after injuries).
1 cross-country ski ergometer
Cross-country ergometer (m: 250m - 20cal; w: 200m - 15cal)
Power
Individual work


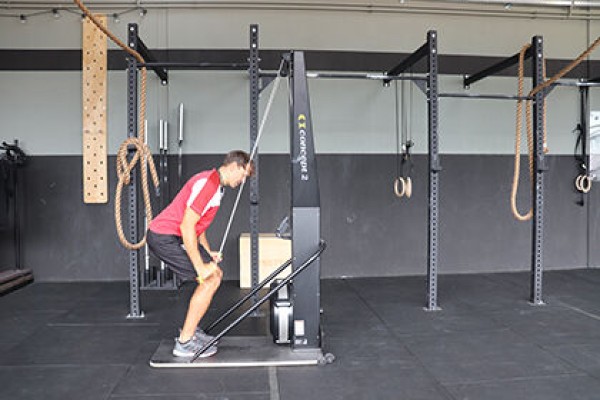


Working with the cross-country ski ergometer does not require any prior knowledge of winter sports, the technique is beginner-friendly and quick to learn. However, there are a few points to bear in mind: Firstly, stand with your feet slightly more than shoulder-width apart (how close you stand to the device is a matter of taste, although taller people usually prefer a greater distance in order to achieve a full arm extension at the starting point and therefore ultimately a longer stroke). The hands should also be just outside the shoulders when gripping the handles. As the handles of the device are attached to freely movable hinges, you can easily rotate them to your optimum position. The edges of the hand, including the little finger, should be placed on the thickened end of the handle, allowing more pressure to be applied. At the beginning of the pull, the entire body is stretched, only the arms remain slightly bent, the handles are now pulled downwards at an angle until the hands are just below the knees (a V-shaped curve, where the hands move sideways away from the body, is avoided). At the lowest point, the elbows are fully extended while the knees are minimally bent (comparable to the starting position of a jump). In the return phase, the body straightens up again completely, synchronised with the backswing of the arms. Lifting your heels off the ground is perfectly fine, especially at higher speeds.
Attention:
Do not turn every repetition into a squat, as this will tire your legs too quickly. Take a deep breath before each pull on the machine and keep the abdominal muscles under constant tension.
Lighten/Harden:
The intensity is controlled by adjusting the air valve. The higher the lever is moved on the scale (1-10), the wider the flap opens and the more air can flow into the bike. More air means more resistance in the initial phase of the pull (comparable to a higher pedalling resistance in the higher gears on a bicycle). It is important to find a setting at which a continuous and controlled pressure can be maintained. If the setting is too high, the air resistance initially has to be overcome with an excessively strong pull and the remaining range of motion "runs into nothing", which is a waste of energy. If you pay attention to the background noise, you will get a suitable indicator: the aim should be to achieve the smoothest possible whirring with only slight peaks in the initial phase of the pull. Most exercisers tend to over-optimise the resistance setting. As is so often the case, less is more; levels 6-7 work well for men and 4-6 for women, with exceptions for particularly heavy and strong athletes.
Variant:
The double pole technique is usually used for training, which means that both arms work in synchronisation with each other. The diagonal technique, in which the arms are used alternately, is less common but can be used as a variation. It achieves lower speeds than the simultaneous use of the arms, but is certainly suitable as an occasional training stimulus, which above all creates a healthy rotation of the spine and a strain on the lateral trunk muscles. The diagonal technique can also correct imbalances in unevenly developed back and arm muscles (e.g. after injuries).
1 cross-country ski ergometer
Cross-country ski ergometer (m: 375m - 30kal; w: 300m - 22kal)
Power
Individual work


Working with the cross-country ski ergometer does not require any prior knowledge of winter sports, the technique is beginner-friendly and quick to learn. However, there are a few points to bear in mind: Firstly, stand with your feet slightly more than shoulder-width apart (how close you stand to the device is a matter of taste, although taller people usually prefer a greater distance in order to achieve a full arm extension at the starting point and therefore ultimately a longer stroke). The hands should also be just outside the shoulders when gripping the handles. As the handles of the device are attached to freely movable hinges, you can easily rotate them to your optimum position. The edges of the hand, including the little finger, should be placed on the thickened end of the handle, allowing more pressure to be applied. At the beginning of the pull, the entire body is stretched, only the arms remain slightly bent, the handles are now pulled downwards at an angle until the hands are just below the knees (a V-shaped curve, where the hands move sideways away from the body, is avoided). At the lowest point, the elbows are fully extended while the knees are minimally bent (comparable to the starting position of a jump). In the return phase, the body straightens up again completely, synchronised with the backswing of the arms. Lifting your heels off the ground is perfectly fine, especially at higher speeds.
Attention:
Do not turn every repetition into a squat, as this will tire your legs too quickly. Take a deep breath before each pull on the machine and keep the abdominal muscles under constant tension.
Lighten/Harden:
The intensity is controlled by adjusting the air valve. The higher the lever is moved on the scale (1-10), the wider the flap opens and the more air can flow into the bike. More air means more resistance in the initial phase of the pull (comparable to a higher pedalling resistance in the higher gears on a bicycle). It is important to find a setting at which a continuous and controlled pressure can be maintained. If the setting is too high, the air resistance initially has to be overcome with an excessively strong pull and the remaining range of motion "runs into nothing", which is a waste of energy. If you pay attention to the background noise, you will get a suitable indicator: the aim should be to achieve the smoothest possible whirring with only slight peaks in the initial phase of the pull. Most exercisers tend to over-optimise the resistance setting. As is so often the case, less is more; levels 6-7 work well for men and 4-6 for women, with exceptions for particularly heavy and strong athletes.
Variant:
The double pole technique is usually used for training, which means that both arms work in synchronisation with each other. The diagonal technique, in which the arms are used alternately, is less common but can be used as a variation. It achieves lower speeds than the simultaneous use of the arms, but is certainly suitable as an occasional training stimulus, which above all creates a healthy rotation of the spine and a strain on the lateral trunk muscles. The diagonal technique can also correct imbalances in unevenly developed back and arm muscles (e.g. after injuries).
1 cross-country ski ergometer
Cross-country ski ergometer (m: 500m - 40k; w: 400m - 30k)
Power
Individual work

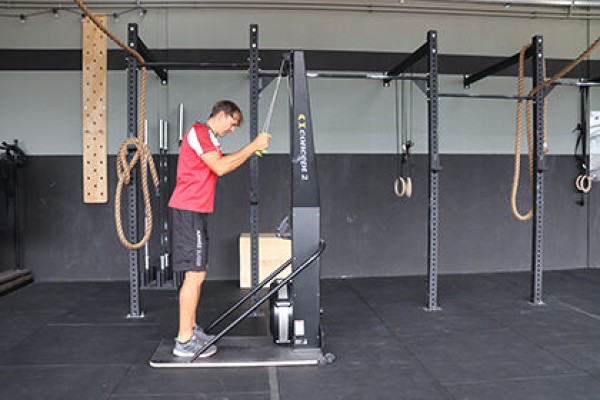


Working with the cross-country ski ergometer does not require any prior knowledge of winter sports, the technique is beginner-friendly and quick to learn. However, there are a few points to bear in mind: Firstly, stand with your feet slightly more than shoulder-width apart (how close you stand to the device is a matter of taste, although taller people usually prefer a greater distance in order to achieve a full arm extension at the starting point and therefore ultimately a longer stroke). The hands should also be just outside the shoulders when gripping the handles. As the handles of the device are attached to freely movable hinges, you can easily rotate them to your optimum position. The edges of the hand, including the little finger, should be placed on the thickened end of the handle, allowing more pressure to be applied. At the beginning of the pull, the entire body is stretched, only the arms remain slightly bent, the handles are now pulled downwards at an angle until the hands are just below the knees (a V-shaped curve, where the hands move sideways away from the body, is avoided). At the lowest point, the elbows are fully extended while the knees are minimally bent (comparable to the starting position of a jump). In the return phase, the body straightens up again completely, synchronised with the backswing of the arms. Lifting your heels off the ground is perfectly fine, especially at higher speeds.
Attention:
Do not turn every repetition into a squat, as this will tire your legs too quickly. Take a deep breath before each pull on the machine and keep the abdominal muscles under constant tension.
Lighten/Harden:
The intensity is controlled by adjusting the air valve. The higher the lever is moved on the scale (1-10), the wider the flap opens and the more air can flow into the bike. More air means more resistance in the initial phase of the pull (comparable to a higher pedalling resistance in the higher gears on a bicycle). It is important to find a setting at which a continuous and controlled pressure can be maintained. If the setting is too high, the air resistance initially has to be overcome with an excessively strong pull and the remaining range of motion "runs into nothing", which is a waste of energy. If you pay attention to the background noise, you will get a suitable indicator: the aim should be to achieve the smoothest possible whirring with only slight peaks in the initial phase of the pull. Most exercisers tend to over-optimise the resistance setting. As is so often the case, less is more; levels 6-7 work well for men and 4-6 for women, with exceptions for particularly heavy and strong athletes.
Variant:
The double pole technique is usually used for training, which means that both arms work in synchronisation with each other. The diagonal technique, in which the arms are used alternately, is less common but can be used as a variation. It achieves lower speeds than the simultaneous use of the arms, but is certainly suitable as an occasional training stimulus, which above all creates a healthy rotation of the spine and a strain on the lateral trunk muscles. The diagonal technique can also correct imbalances in unevenly developed back and arm muscles (e.g. after injuries).
1 cross-country ski ergometer
Cross-country ski ergometer (m: 750m - 60k; w: 600m - 45k)
Power
Individual work


Working with the cross-country ski ergometer does not require any prior knowledge of winter sports, the technique is beginner-friendly and quick to learn. However, there are a few points to bear in mind: Firstly, stand with your feet slightly more than shoulder-width apart (how close you stand to the device is a matter of taste, although taller people usually prefer a greater distance in order to achieve a full arm extension at the starting point and therefore ultimately a longer stroke). The hands should also be just outside the shoulders when gripping the handles. As the handles of the device are attached to freely movable hinges, you can easily rotate them to your optimum position. The edges of the hand, including the little finger, should be placed on the thickened end of the handle, allowing more pressure to be applied. At the beginning of the pull, the entire body is stretched, only the arms remain slightly bent, the handles are now pulled downwards at an angle until the hands are just below the knees (a V-shaped curve, where the hands move sideways away from the body, is avoided). At the lowest point, the elbows are fully extended while the knees are minimally bent (comparable to the starting position of a jump). In the return phase, the body straightens up again completely, synchronised with the backswing of the arms. Lifting your heels off the ground is perfectly fine, especially at higher speeds.
Attention:
Do not turn every repetition into a squat, as this will tire your legs too quickly. Take a deep breath before each pull on the machine and keep the abdominal muscles under constant tension.
Lighten/Harden:
The intensity is controlled by adjusting the air valve. The higher the lever is moved on the scale (1-10), the wider the flap opens and the more air can flow into the bike. More air means more resistance in the initial phase of the pull (comparable to a higher pedalling resistance in the higher gears on a bicycle). It is important to find a setting at which a continuous and controlled pressure can be maintained. If the setting is too high, the air resistance initially has to be overcome with an excessively strong pull and the remaining range of motion "runs into nothing", which is a waste of energy. If you pay attention to the background noise, you will get a suitable indicator: the aim should be to achieve the smoothest possible whirring with only slight peaks in the initial phase of the pull. Most exercisers tend to over-optimise the resistance setting. As is so often the case, less is more; levels 6-7 work well for men and 4-6 for women, with exceptions for particularly heavy and strong athletes.
Variant:
The double pole technique is usually used for training, which means that both arms work in synchronisation with each other. The diagonal technique, in which the arms are used alternately, is less common but can be used as a variation. It achieves lower speeds than the simultaneous use of the arms, but is certainly suitable as an occasional training stimulus, which above all creates a healthy rotation of the spine and a strain on the lateral trunk muscles. The diagonal technique can also correct imbalances in unevenly developed back and arm muscles (e.g. after injuries).
1 cross-country ski ergometer
Sparring
Light-Contact
Group work
Groups of 3


Sparring in a three-man team: two boxers and a referee. After a while, the roles are switched.
Participant:
1 pair of boxing gloves
Sparring
Light-Contact
Partner work


Sparring between two participants, with one always taking the role of the attacker and the other the defender. In the next round, the roles are swapped. The attacker makes sure to constantly cut the defender's path (shorten the path) so that he can immediately move on to the next attack. The defender, for his part, tries to evade the attacker by moving in the shape of a banana.
Participant:
1 pair of boxing gloves
Sparring with restrictions
Light-Contact
Partner work

Sparring with restrictions, e.g. both boxers only use the lead hand.
Participant:
1 pair of boxing gloves
Mirror run
Light-Contact
Partner work


Two participants stand opposite each other. One participant moves to the side with a step. The feet remain shoulder-width apart, the foot closer to the direction of movement initiates the movement. The weight is on the balls of the feet, the steps are springy and gliding. The partner constantly tries to remain facing him and imitate all (arm) movements. After a while, the roles are swapped.
No material required
Mirror jump
Light-Contact
Partner work

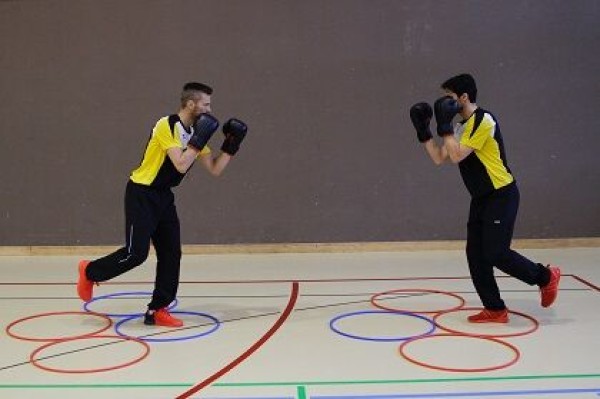
Two participants stand opposite each other on one leg and both hold their fists at head height. One participant sets the positions by jumping with one leg between the tyres laid out on the floor (identical tyre arrangement for both participants). The second participant tries to re-establish the same distance as quickly as possible. After a certain time, change the jumping leg and/or the rollers.
Per group:
8 tyres