Exercises (2330)
Extension and flexion of one leg in sitting position (left) ► leg extension
Power
Individual work


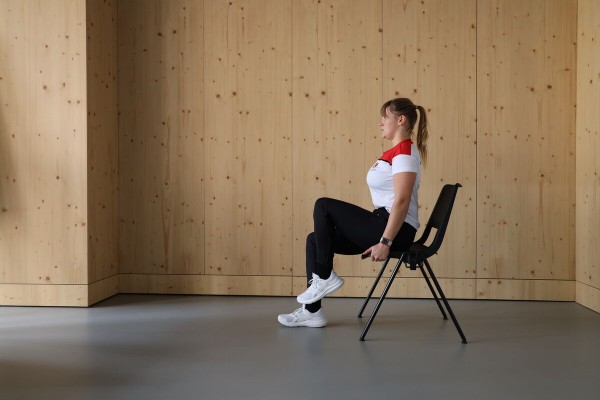
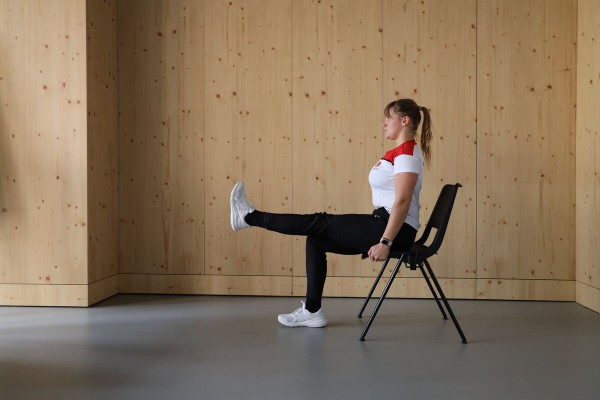
When sitting upright, one leg (right) is placed on the floor and the other is lifted slightly off the floor (approximately 90 degree angle in the knee joints). Extend the free leg (left) horizontally towards the floor and return to the starting position.
Attention:
The movement only takes place in the knee joint (upper body and thighs remain stable).
1 (office) chair
Extension and flexion of one leg in sitting position (right) ► leg extension
Power
Individual work


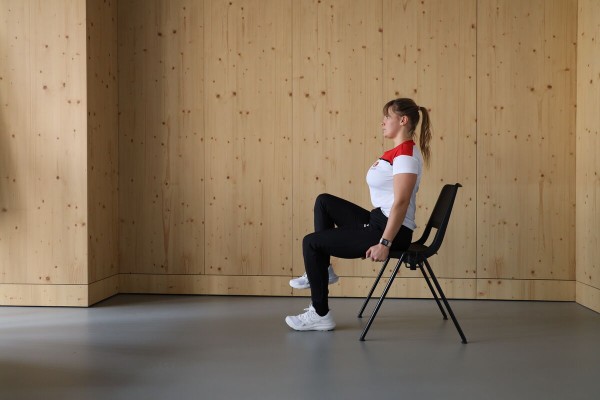
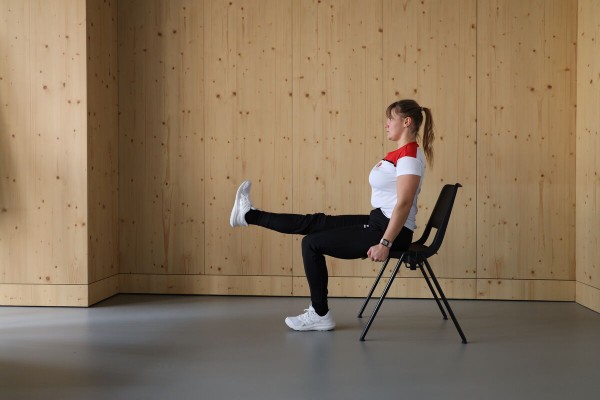
When sitting upright, one leg (left) is placed on the floor and the other is lifted slightly off the floor (approximately 90 degree angle in the knee joints). Extend the free leg (right) horizontally towards the floor and return to the starting position.
Attention:
The movement only takes place in the knee joint (upper body and thighs remain stable).
1 (office) chair
Alternating extension and flexion of one leg while seated ► leg extension
Power
Individual work
When sitting upright, place both legs on the floor (approx. 90 degree angle in the knee joint). Alternately lift one leg and extend it horizontally towards the floor and return to the starting position.
Attention:
The movement takes place exclusively in the knee joint (upper body and thighs remain stable).
1 (office) chair
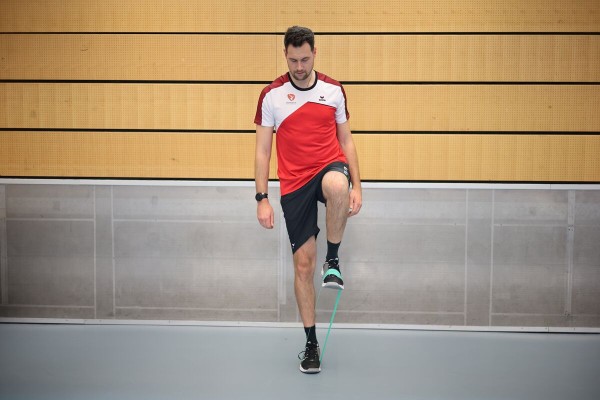
Extension and flexion of one leg in standing position (left)
Power
Individual work
Stand upright with your feet shoulder-width apart, lift your training leg (left) slightly off the floor, hold an elasticated rubber band with the foot of your training leg (place the band around the instep/sole of your foot), fix the other end of the rubber band to the floor with your standing leg (right). From this position, raise the training leg (left) (bend the knee to hip height - one-sided hip flexion) and lower it back to the starting position.
Caution:
Consciously tense your abdomen and keep your upper body as stable as possible.
Lighten:
Choose a rubber band with less resistance.
Heavier:
Choose a rubber band with more resistance.
1 mini-band
Extension and flexion of one leg in standing position (right)
Power
Individual work

Stand upright with your feet shoulder-width apart, lift your training leg (right) slightly off the floor, hold an elasticated rubber band with the foot of your training leg (place the band around the instep/sole of your foot), fix the other end of the rubber band to the floor with your standing leg (left). From this position, raise the training leg (right) (bend the knee to hip height - one-sided hip flexion) and lower it back to the starting position.
Caution:
Consciously tense your abdomen and keep your upper body as stable as possible.
Lighten:
Choose a rubber band with less resistance.
Heavier:
Choose a rubber band with more resistance.
1 mini-band
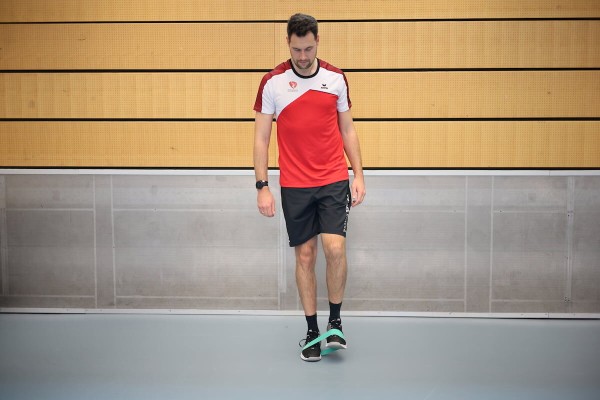
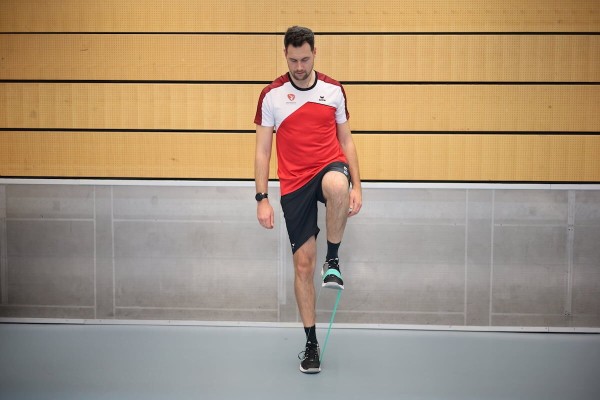
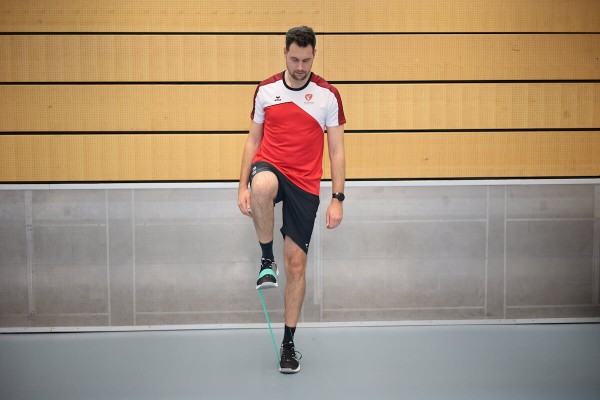
Alternating extension and flexion of one leg while standing
Power
Individual work
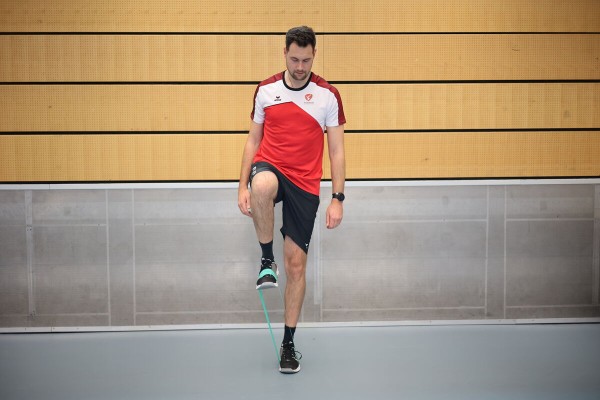
Stand upright with your feet shoulder-width apart on an elasticated band (wrap the band around the soles/crests of your feet), alternately raise one leg (bend your knee to hip height - one-sided hip flexion) to stretch/tension the band and lower it back to the starting position.
Attention:
consciously tense your abdomen, keep your upper body as stable as possible.
Lighten:
choose a rubber band with less resistance.
Harden:
choose a rubber band with greater resistance.
1 mini-band
Alternating extension and flexion of one leg while standing (knee raise in place / skipping) ► run in place with knee raise (high knees)
Power
Individual work
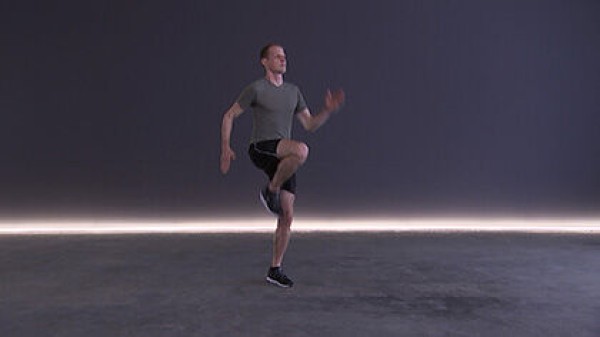

Stand upright with hips wide apart (starting position, then one leg always moving freely), alternately lift one knee straight up to navel height and lower it back to the standing position, the arms swing along and support the movement (knee lift in place). The rhythm/intensity can be varied.
Attention:
Keep your upper body stable/upright, actively support the movement with your arms.
Lighten:
Lift your knees less high; slower execution (reduce rhythm/intensity).
Harden:
Lift your knees higher; fast execution (increase rhythm/intensity); additional weight on your legs (hold in your hands).
Variant I:
Execute the movement very slowly and linger briefly in the one-legged stance to further improve your balance.
Variant II:
Arms folded behind the head, elbows crossed towards the raised knee.
Variant III:
Knees turned out to the side when lifting, arms swinging more to the side.
2 weight cuffs/weight balls/dumbbells/1 weight waistcoat ► Make the exercise more difficult (additional weight)
Alternating extension and flexion of one leg while standing (knee raise in place / skipping) ► run in place with knee raise (high knees)
Power
Individual work


Knee lift (lift your knees alternately with high intensity up to the level of your navel and actively support the movement with your arms) on a small soft mat, which rests on a large soft mat.
Attention:
Actively move your arms and not just swing them to the side of your body. Bend your arm and leg in opposite directions (not on the same side).
Lighten:
Lift your knees less; small soft mat lies on the floor (without large soft mat).
Harden:
Additional weights (on the legs). Perform a knee lift on the large soft mat (remove the small mat).
1 soft mat (large)
1 soft mat (small) ► Make the exercise easier
2 weight cuffs/1 weight waistcoat ► Make the exercise more difficult (additional weight)
Alternating extension and flexion of one leg while standing (knee raise in place / skipping) ► run in place with knee raise (high knees)
Power
Individual work

Stand upright with hips wide apart (starting position, then one leg always moving freely), alternately lift one knee straight up to navel height and lower it back to the standing position, the arms swing along and support the movement (knee lift in place). The rhythm/intensity can be varied.
Attention:
Keep your upper body stable/upright, actively support the movement with your arms.
Lighten:
Lift your knees less high; slower execution (reduce rhythm/intensity).
Harden:
Lift your knees higher; fast execution (increase rhythm/intensity); perform the exercise on a soft mat.
Variant I:
Execute the movement very slowly and linger briefly in the one-legged stance to further improve your balance.
Variant II:
Arms folded behind the head, elbows crossed towards the raised knee.
Variant III:
Knees turned out to the side when lifting, arms swinging more to the side.
1 soft mat ► Make the exercise more difficult
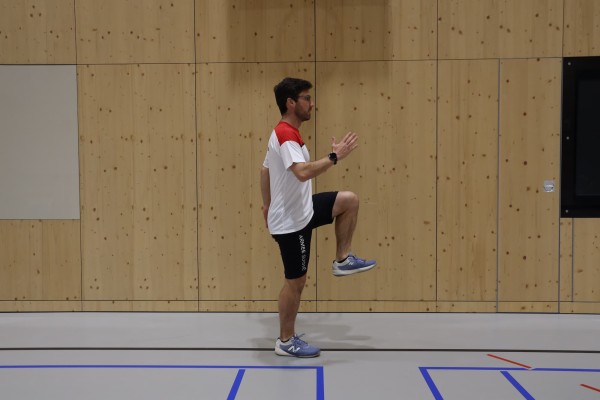
Alternating extension and flexion of one leg while standing ► knee raise
Power
Individual work


Stand upright with your feet shoulder-width apart, hold your assault rifle outstretched (at chest height), lift your knees alternately to the height of your navel.
Lighten:
Lift your knees less.
Harden:
Do not put your heels down/stand only on the balls of your feet (additional strain on the calf muscles and more demanding in terms of coordination).
Variant:
Fast exercise execution (knee lift).
1 assault rifle (neutralised)
Alternating extension and flexion of one leg while standing ► wall drill / marching
Power
Individual work
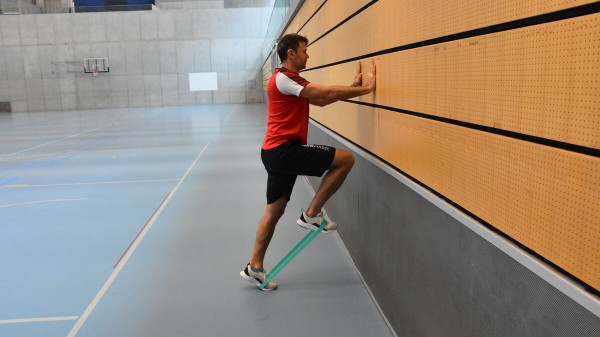

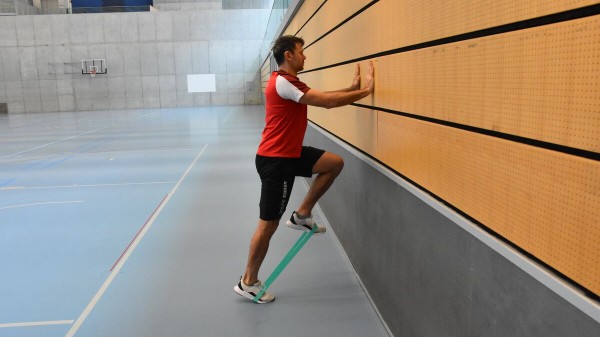
With your upper body leaning slightly forwards, support yourself against a wall with your hands (arms practically stretched out - facing the wall), rest both straight legs on the balls of your feet with an elasticated band under your feet. Step into the loop of the band with the instep of the foot. From this position, alternately raise one leg (knee at hip height) to further stretch/tension the band and lower it back to the starting position. The respective supporting leg fixes the band to the floor when the training leg is raised. The exercise is similar to running in place, with the knees always raised almost to the navel.
Attention:
The movement takes place exclusively in the hip and knee joint of the training leg.
Lighten:
Choose a rubber band with less resistance.
Harden:
Choose a rubber band with greater resistance.
1 wall
1 mini band
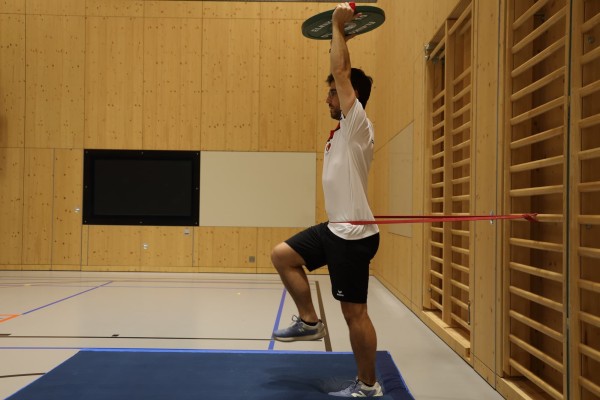
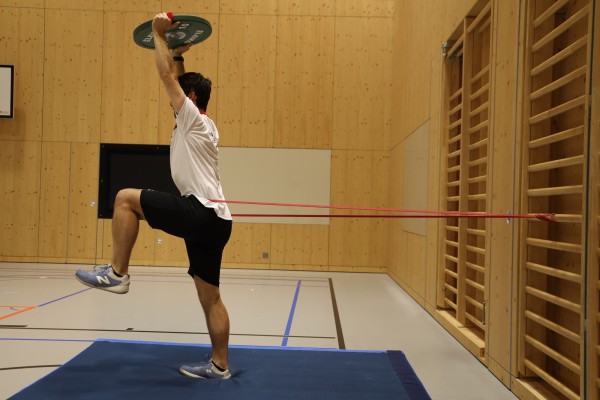
Extension and flexion of one leg in standing position alternating with arms in high holding position (knee raise in place / skipping) ► run in place with knee raise (high knees)
Power


A fixed elasticated band (e.g. on the wall bars, on a post or candelabra) is worn around the hips. Move away from the attachment of the elastic band so that the band is well tensioned. Knee lift (lift your knees alternately with high intensity up to the level of your navel), holding a weight disc overhead with your arms almost outstretched.
Lighten:
Lift your knees less; less weight or no weight at all in the hold-up position.
Harden:
Stronger elastic band; more weight in the hold-up position; additional weights on the legs; knee lift on a soft surface (e.g. small soft mat).
1 weight disc
1 elasticated rubber band (medium)
1 elasticated rubber band (strong) ► Make the exercise more difficult (stability)
2 weight cuffs ► Make the exercise more difficult (additional weight)
1 small soft mat ► Make the exercise more difficult (base)
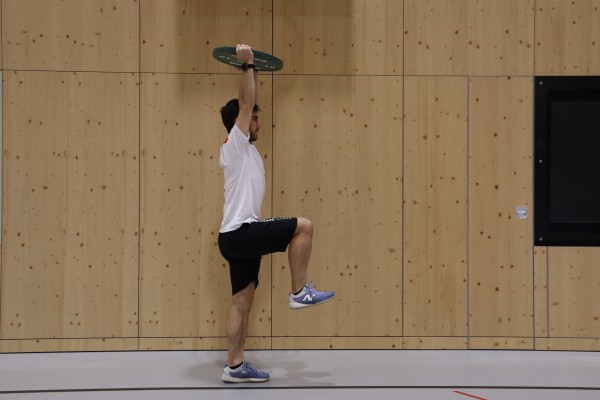
Extension and flexion of one leg in standing position alternating with arms in high holding position (knee raise in place / skipping) ► run in place with knee raise (high knees)
Power
Individual work
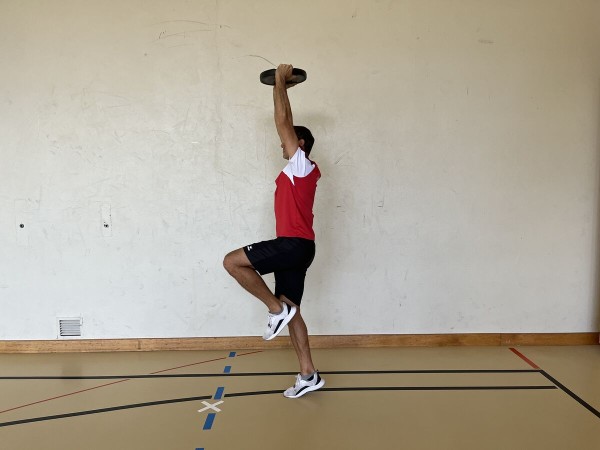
Knee lift on the spot (lift your knees alternately with high intensity up to the level of your navel), holding a weight disc overhead with your arms almost outstretched.
Lighten:
Lift your knees less; less weight or no weight at all in the hold-up position.
Harden:
More weight in the hold-up position; additional weights on the legs; knee lift on a soft surface (e.g. small soft mat). Wear an attached elasticated band around your hips, move away from the attachment until the band is taut enough to complete the knee lift.
1 weight disc/medicine ball/dumbbell/kettlebell
1 elasticated rubber band ► to make the exercise more difficult (stability)
2 weight cuffs ► to make the exercise more difficult (additional weight)
1 small soft mat ► to make the exercise more difficult (support)
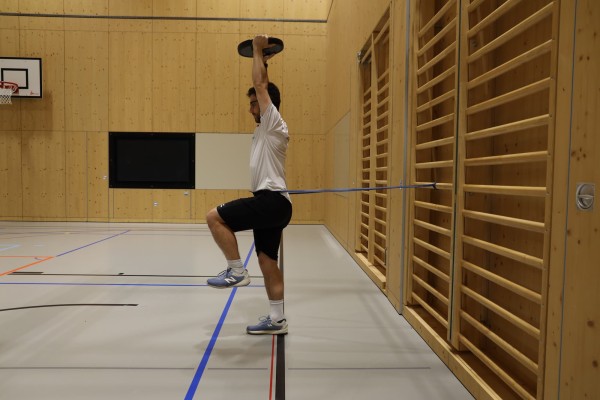
Extension and flexion of one leg in standing position alternating with arms in high holding position (knee raise in place / skipping) ► run in place with knee raise (high knees)
Power
A fixed elasticated band (e.g. on the wall bars, on a post or candelabra) is worn around the hips. Move away from the attachment of the elastic band so that the band is well tensioned. Knee lift (lift your knees alternately with high intensity up to the level of your navel), holding a weight disc overhead with your arms almost outstretched.
Lighten:
Lift your knees less; less weight or no weight at all in the hold-up position.
Harden:
Stronger elastic band; more weight in the hold-up position; additional weights on the legs; knee lift on a soft surface (e.g. small soft mat).
1 weight disc
1 elasticated rubber band (medium)
1 elasticated rubber band (strong) ► Make the exercise more difficult (stability)
2 weight cuffs ► Make the exercise more difficult (additional weight)
1 small soft mat ► Make the exercise more difficult (base)
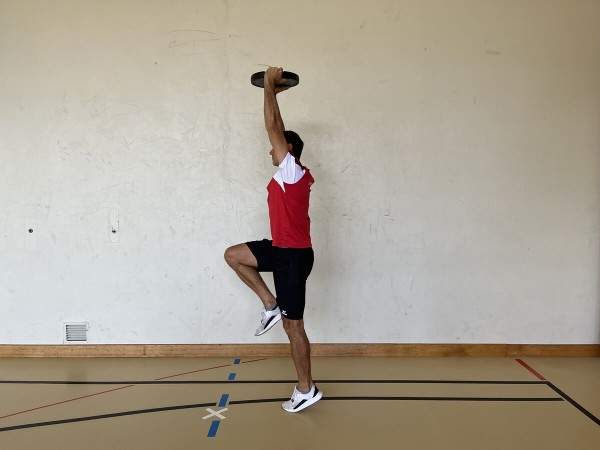
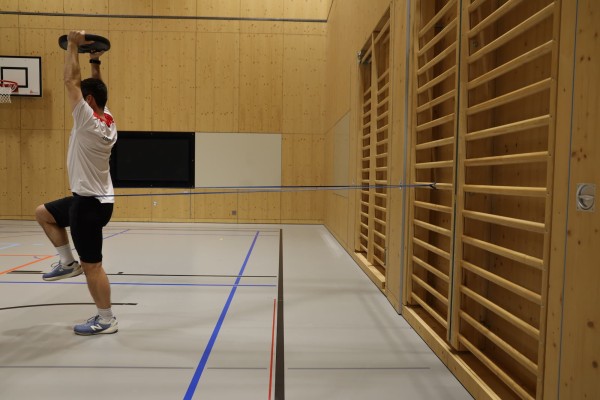
Extension and flexion of one leg in standing position alternating with arms in high holding position (knee raise in place / skipping) ► run in place with knee raise (high knees)
Power
Individual work

Knee lift on the spot (lift your knees alternately with high intensity up to the level of your navel), holding a weight disc overhead with your arms almost outstretched.
Caution:
Keep the upper body stable/upright.
Lighten:
Lift your knees less; less weight or no weight at all in the hold-up position.
Harden:
More weight in the hold-up position; additional weights on the legs; knee lift on a soft surface (e.g. small soft mat).
Variation:
use 2 dumbbells instead of a weight plate.
1 weight disc/medicine ball/dumbbell/kettlebell
2 weight cuffs ► to make the exercise more difficult (additional weight)
1 small soft mat ► to make the exercise more difficult (support)
Extension and flexion of one leg in standing position alternating with arms in high holding position (knee raise in place / skipping) ► run in place with knee raise (high knees)
Power
A fixed elasticated band (e.g. on the wall bars, on a post or candelabra) is worn around the hips. Move away from the attachment of the elastic band so that the band is well tensioned. Knee lift (lift your knees alternately with high intensity up to the level of your navel), holding a weight disc overhead with your arms almost outstretched.
Lighten:
Lift your knees less; less weight or no weight at all in the hold-up position.
Harden:
Stronger elastic band; more weight in the hold-up position; additional weights on the legs; knee lift on a soft surface (e.g. small soft mat).
1 weight disc
1 elasticated rubber band (medium)
1 elasticated rubber band (strong) ► Make the exercise more difficult (stability)
2 weight cuffs ► Make the exercise more difficult (additional weight)
1 small soft mat ► Make the exercise more difficult (base)
Alternating extension and flexion of one leg in support ► knee raise
Power
Individual work


Support yourself on the top of the vaulting box, buttocks on the edge (arms behind your back, fingers pointing towards your body), alternately lift/bend one knee up to hip height against resistance, keeping the other leg extended downwards. Resistance: Weight cuff on the legs or elasticated rubber band (tuck the elastic under the swinging box).
Attention:
Do not rest your buttocks on the swinging box.
Lighten:
Lower resistance (no weight cuffs or softer elastic).
Harden:
More resistance (harder elastic).
Variant:
Exercise hanging from the wall bars (back against the bars) instead of supported on the vaulting box (elastic attached to the bottom bar of the wall bars).
1 vaulting box
2 weight cuffs/1 elasticated rubber band
1 wall bars ► Variation of the exercise (position)
Alternating extension and flexion of one leg in support ► knee shift
Power
Individual work
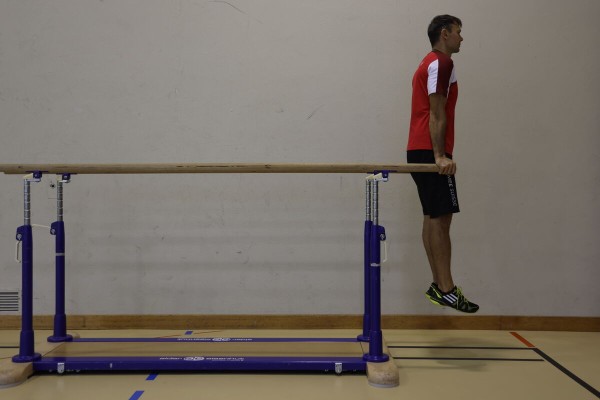
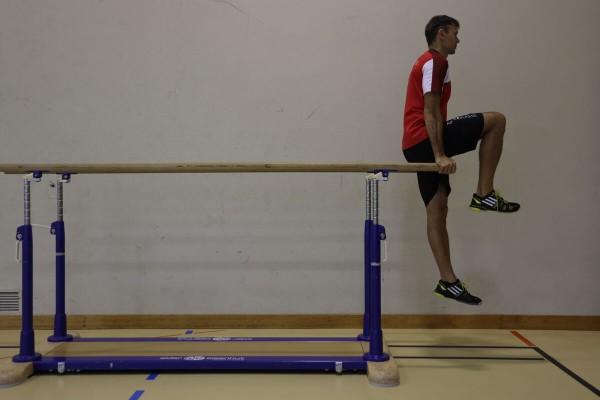
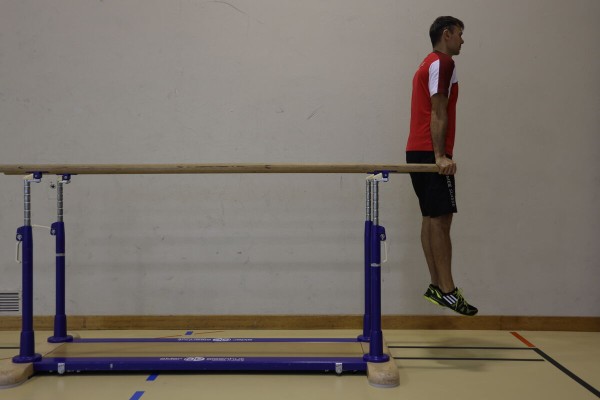
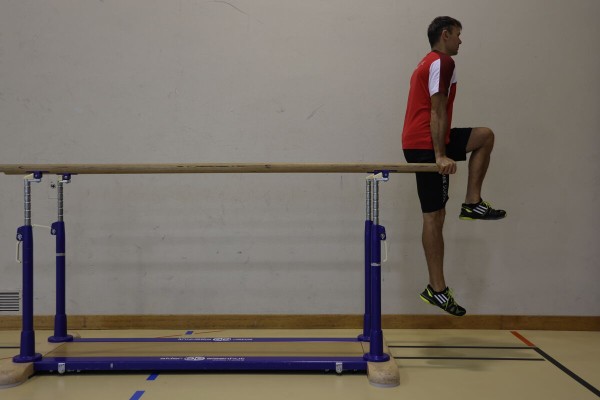
Stand at the bar (end), body stretched, legs pointing (closed) towards the floor, alternately bend one leg and raise the knee to the level of the navel. Then stretch the leg back to the starting position (raise and lower the leg) to perform the exercise with the other leg.
Attention:
Keep the upper body/arm position stable during the exercise (elbows close to the body), slightly forward with the upper body, perform the movement in a controlled manner.
Lighten:
Lift the leg less.
Harden:
Additional weight (on the legs); tighten the elastic band between the legs.
Variation:
Bend both legs at the same time.
1 bar
2 weight cuffs/1 elasticated rubber band ► Make the exercise more difficult (additional weight)
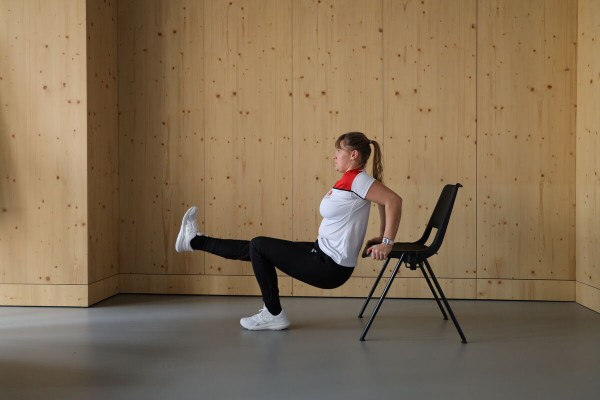
Extension and flexion of one leg backwards (left) ► leg extension
Power
Individual work


Place one leg (right) on the floor and lift the other very slightly off the arch (approximately 90 degree angle in the knee joints), support the upper body with the hands on the seat of the chair (arms stretched behind the back, hands pointing towards the body). From this position, extend the free leg (left) horizontally towards the floor and return to the starting position.
Attention:
The movement takes place exclusively in the knee joint (upper body and thighs remain stable).
1 (office) chair
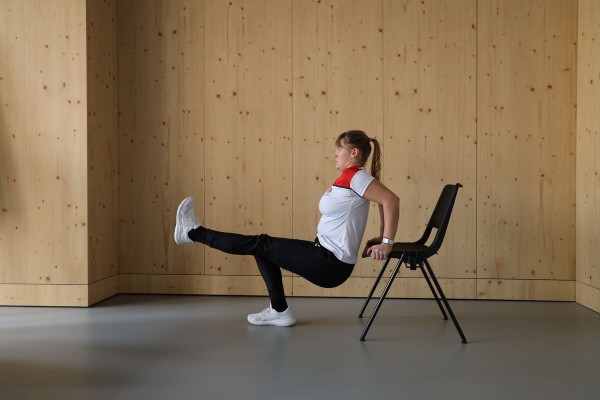
Extension and flexion of one leg backwards (right) ► leg extension
Power
Individual work

Place one leg (left) on the floor and lift the other very slightly off the arch (approx. 90 degree angle in the knee joints), support the upper body with your hands on the seat of the chair (stretched arms behind the back, hands pointing towards the body). From this position, extend the free leg (right) horizontally towards the floor and return to the starting position.
Attention:
The movement takes place exclusively in the knee joint (upper body and thighs remain stable).
1 (office) chair
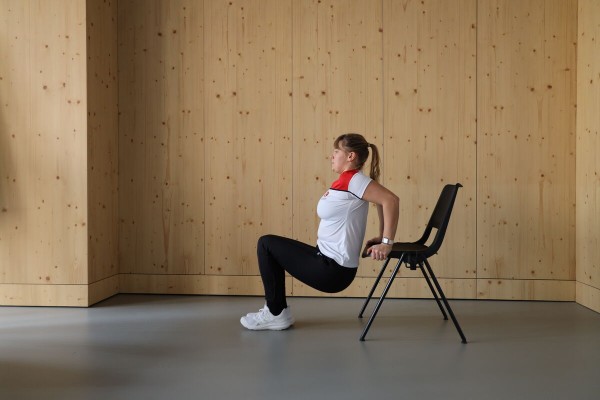
Extension and flexion of one leg alternating backwards in support ► leg extension
Power
Individual work

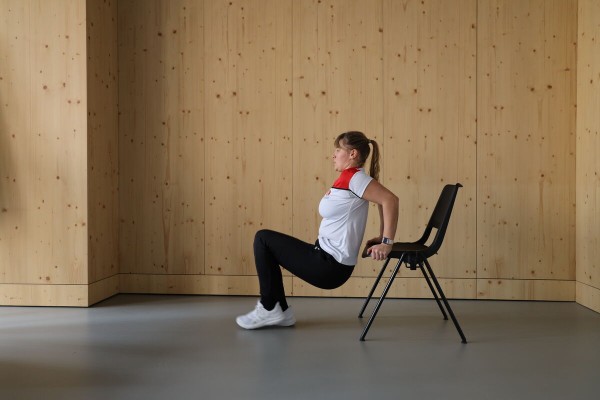
Place your legs on the floor at an angle of approximately 90 degrees with your knees together and support your upper body with your hands on the seat of the chair (arms outstretched behind your back, hands pointing towards your body). From this position, alternately lift one leg and extend it horizontally towards the floor and return to the starting position.
Attention:
The movement only takes place in the knee joint (upper body and thighs remain stable).
1 (office) chair
Alternating extension and flexion of one leg in push-up position ► barbell knee blast / mountain climber
Power


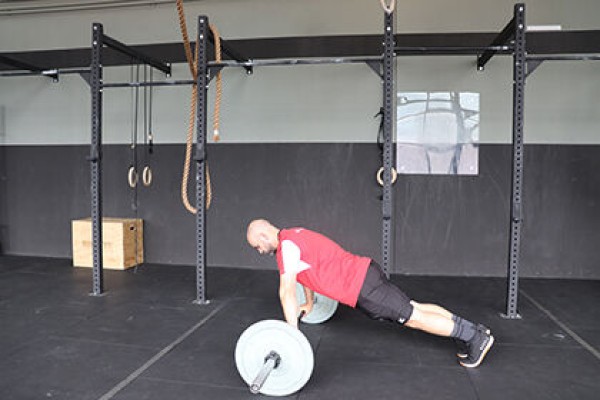

Lieback position, resting your arms on a barbell (possibly with weight plates) at about shoulder width (high support, face/look down), alternately bend one leg and lift it slightly off the floor (bring your knees between your arms/to your chest).
Attention:
Keep your upper body as stable as possible (entire body forms a line from the shoulders to the feet), no hollow back (tighten your stomach).
Lighten:
Just hold the basic position (push-up position); barely lift your leg off the floor and/or move it less forwards; perform the exercise without a barbell.
Harden:
Add weight to the legs.
Variant:
Move your knee diagonally (crosswise) to the opposite arm.
1 barbell
2 weight cuffs ► Make the exercise more difficult (additional weight)
Extension and flexion of one leg in push-up position alternating ► mountain climber
Power
Individual work


High plank position, hands directly beneath the shoulders, arms straight, body in a straight line. Actively engage the core (abdomen and glutes). Alternately bring your knees towards your chest (right knee to chest – back to the starting position – left knee to chest). Keep your upper body as stable as possible throughout the exercise. The movement can be performed slowly (in a controlled manner) or quickly (with a focus on cardio). Keep your breathing steady.
Attention:
Do not arch your back during the movement; do not bounce your hips up and down too vigorously; do not let your shoulders slump forwards; do not increase your speed too much without maintaining control; do not land your feet uncontrollably; do not let your head hang down or lean forwards (this puts strain on your neck).
Ligthen:
Slower pace (step-by-step rather than sprinting – more control, less cardio strain); hands raised (e.g. on a bench or box); shorter range of motion (knees only slightly towards the chest); Place feet down deliberately instead of ‘running’; lift feet alternately in a controlled manner instead of bending them; knee-plank-mountain climbers.
Harden:
Faster pace (high-intensity – greater cardiovascular and core strain); slow, controlled execution (time under tension – more core and stabilisation work); Sliding mats for less friction and more core work (e.g. sliders/towels); cross mountain climbers (more oblique abdominal muscles).
Variation:
Bring your knee diagonally (across) towards the opposite arm.
2 Weighted cuffs/sliders/towels ► Make the exercise more challenging (additional weight/sliding surface)
1 Balance cushion/balance board ► Make the exercise more challenging (unstable surface)
Extension and flexion of one leg in push-up position alternating ► mountain climber
Power
Individual work

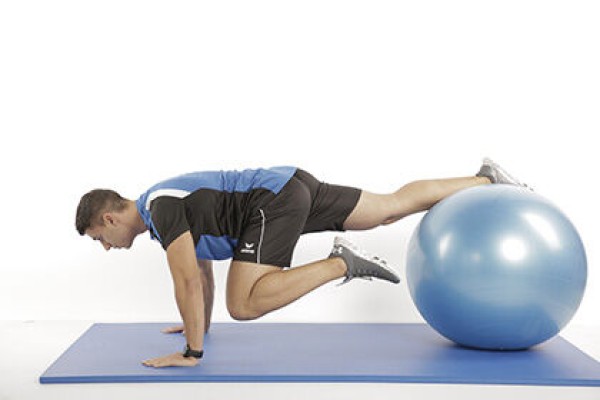
Push-up position, legs resting on the exercise ball (shins), alternately bring one knee to the arms (chest height)/bend the leg.
Attention:
Head, shoulders, buttocks and feet form a line, no hollow back, actively tense the torso. To prevent the ball from rolling away, you can lean it against a wall.
Lighten:
Support in place (without tightening the leg); exercise ball closer to the hips.
Harden:
Additional weight (on the back); tighten both legs simultaneously (roll the ball towards the body); unstable support for the arms.
1 exercise ball
1 weight vest/weight disc/sandbag ► to make the exercise more difficult (additional weight)
1 balance cushion/balance board ► to make the exercise more difficult (unstable base)
Extension and flexion of one leg in push-up position alternating ► mountain climber
Power
Individual work
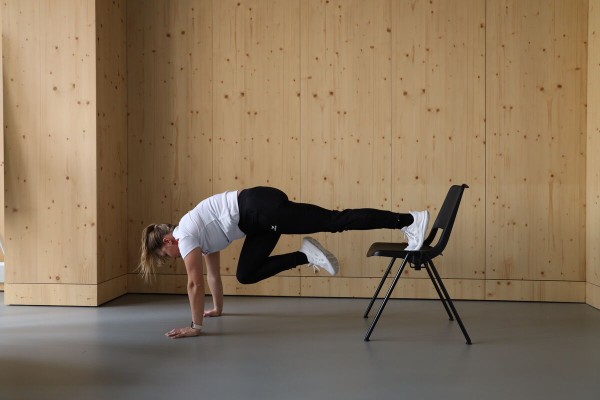
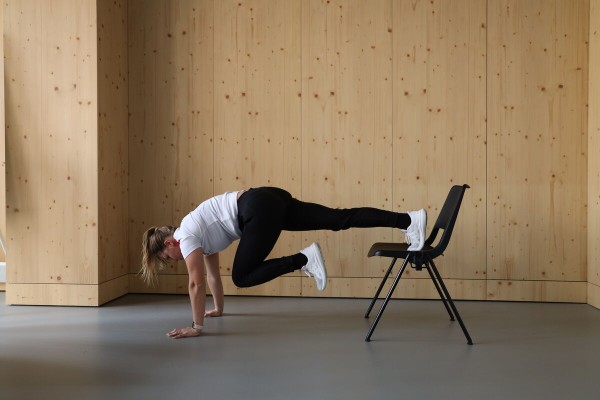
Push-up position with your feet placed on the seat of the chair, alternately bring one knee to your arms (chest height)/bend your leg.
Attention:
Head, shoulders, buttocks and feet form a line, no hollow back, actively tense your torso.
1 (office) chair (without castors)