Exercises (2330)
Leap into the air
Power
Individual work


Stand upright with your feet shoulder-width apart and your arms supported on your hips. Jump straight up with both legs (feet extended during the flight phase).
Attention:
Maintain an upright position (body tension).
Ligthen:
Smaller/less intense jumps.
Harden:
Hold additional weight (on the legs, on the shoulders, in the hands); jump on a soft surface.
Variant I:
Never put your heels down completely.
Variant II:
Pause between jumps (complete stance) or jump continuously.
Variant III:
Touch the floor with your hands after each jump (knee bend), stretch your arms upwards during the jump (stretch jump).
Variant IV:
Pull your knees up to the height of your navel at the same time as you jump, arms bent in front of you.
2 weight cuffs/short dumbbells/1 weight vest/sandbag/fighting backpack ► making the exercise more difficult (additional weight)
1 small/large soft mat ► making the exercise more difficult (base)
Leap into the air
Power
Individual work


Round course over box elements of different heights. Place a soft mat (small) between the elements and at the end of the course (crosswise - wide side of the mat facing the long side of the box). Jump onto the vaulting box element with both legs and back down again.
Attention:
Pause briefly on the vaulting box, cushion the landing with your legs (lower your buttocks), do not let your knees swing outwards/inside.
Lighten:
Less high elements.
Harden:
Higher elements.
Variant:
When jumping down, jump up again immediately after landing (explosive power) or take a roughly right angle with your knees when landing and hold this position briefly before jumping off again.
3 Swedish box
3 soft mats (small)
Jump into the air (squat jump) ► tuck jump
Power
Individual work


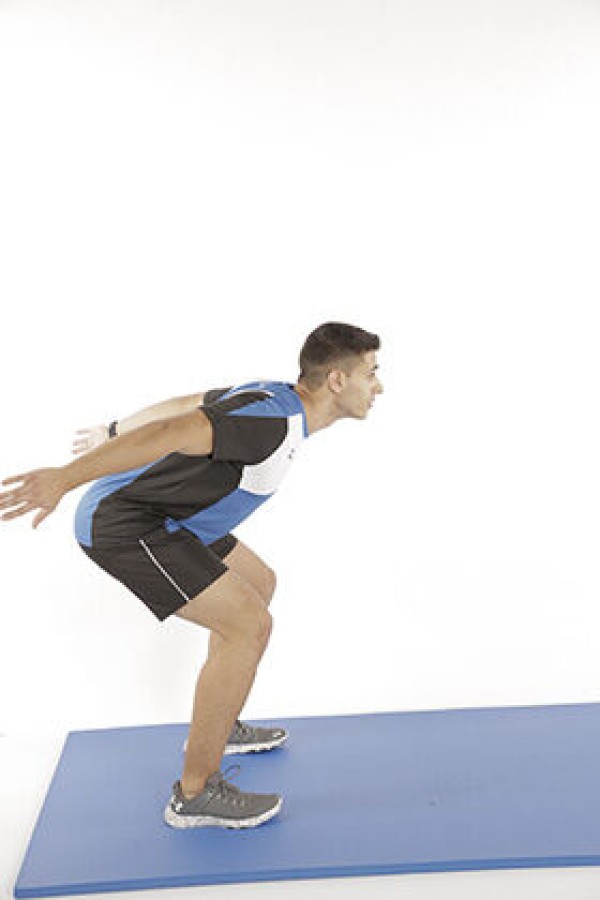
Stand upright shoulder-width apart with your arms outstretched at chest height in front of you, bend your legs slightly (squat down slightly) and push your legs off the floor in a fluid movement to jump upwards (raise your arms horizontally as a swing). During the jump, pull your knees up towards your chest as far as possible (squat jump). Then land in a controlled manner (cushion the jump) and initiate the next jump.
Attention:
Keep your back straight, cushion the jump as you land, keep your whole foot on the ground without bending your knees and keep your knees behind your toes while your legs are in contact with the ground. The palms of your hands touch your knees with every jump.
Ligthen:
Smaller/less intense jumps, pull your knees up less.
Harden:
Additional weight; jump on a soft surface.
2-4 weight cuffs/2 dumbbells/1 weight waistcoat ► Making the exercise more difficult (additional weight)
1 small/large soft mat ► Making the exercise more difficult (base)
One-legged jump into the air (left)
Power
Individual work


Stand upright on one leg (right leg slightly raised off the ground or bent) with your arms supported on your hips. Take a powerful jump with the training leg (left) straight up into the air (stretch your foot during the flight phase).
Attention:
Maintain an upright position (body tension).
Lighten:
Smaller/less intense jumps.
Harden:
Hold additional weight (on the leg, on the shoulders, in the hands); jump on a soft surface.
Variant I:
Pause between jumps (complete stance) or continuous jumping.
Variant II:
Tighten the knees to the height of the navel at the same time as jumping.
1 weight cuff/weight vest/sandbag/fighting backpack/2 dumbbells ► making the exercise more difficult (additional weight)
1 small/large soft mat ► making the exercise more difficult (base)
One-legged jump into the air (right)
Power
Individual work


Stand upright on one leg (left leg slightly raised off the ground or bent) with your arms supported on your hips. Take a powerful jump with the training leg (right) straight up into the air (stretch your foot during the flight phase).
Attention:
Maintain an upright position (body tension).
Lighten:
Smaller/less intense jumps.
Harden:
Hold additional weight (on the leg, on the shoulders, in the hands); jump on a soft surface.
Variant I:
Pause between jumps (complete stance) or continuous jumping.
Variant II:
Tighten the knees to the height of the navel at the same time as jumping.
1 weight cuff/weight vest/sandbag/fighting backpack/2 dumbbells ► making the exercise more difficult (additional weight)
1 small/large soft mat ► making the exercise more difficult (base)
Jumping up and flexing the arms on a slope (pull-up) ► jumping pull up
Power
Individual work


Stand upright and position yourself slightly offset backwards under a high bar. With a small hop, bring your outstretched arms to the bar with an overhand grip (back of hand pointing towards your face). As soon as you have grasped the bar, bend your arms in one smooth movement to pull your upper body up as vertically as possible until your chin is over the bar (arms almost at shoulder height). Then release your hands from the bar to land on the floor in a standing position.
Attention:
Pull your body up as vertically as possible.
Lighten:
Stand with both feet or one foot in the loop of an elasticated rubber band attached to the horizontal bar.
Harden:
Additional weight.
Variant:
Grab the bar with an underhand grip (palm facing your face).
1 horizontal bar
1 elasticated rubber band ► Make the exercise easier (support)
2 weight cuffs/1 weight waistcoat ► Make the exercise more difficult (additional weight)
Leap into the distance
Power
Individual work

Stand with your hips wide apart, legs slightly bent and arms supported on your hips. Jump forwards with both legs, then hop backwards to the starting position.
Attention:
Lower your buttocks backwards when landing (do not move your knees forwards), pause briefly with your knees bent after each landing.
Lighten:
Bend your knees less (greater angle); less wide/intense jumps.
Harden:
Bend your knees more (smaller angle); hold your arms in front of you; hold additional weight (on your shoulders, in front of your chest or in your hands).
Variant:
Arms support the movement by swinging with you (lead from back to front when jumping forwards).
2-4 weight cuffs/2 weight balls/dumbbells/1 weight vest/weight disc/sandbag/fighting rucksack ► Make the exercise more difficult (additional weight)
Jump forwards and shift backwards in a four-footed stance alternating ► bear crawl jump
Power
Individual work


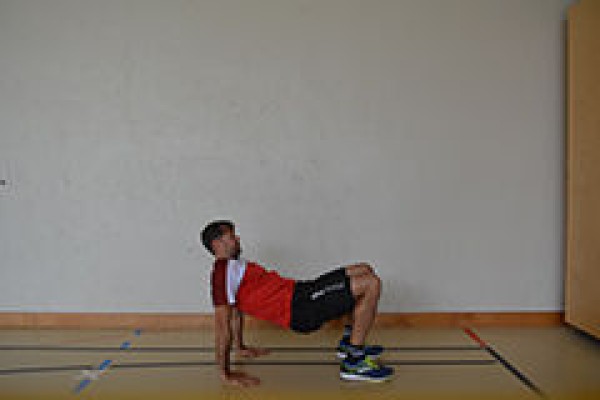


Stand with your hips wide apart, legs slightly bent and arms supported on your hips, jump forwards with both legs. Then, in an inverted four-footed stance (chest facing upwards, body supported on the hands and feet, fingertips pointing forwards), shift back to the starting point. When moving on all fours, the arms are almost fully extended, the legs are bent and the movement is in the direction of the arms.
Attention:
Always keep your knees behind the tips of your feet when jumping, pause briefly with your knees bent after each landing.
Lighten:
Bend your knees less (greater angle) when jumping and landing; jump less far forwards.
Harden:
Bend your knees more (smaller angle) when jumping and landing; jump with your arms in front of you; additional weight.
Variation:
Don't keep your arms supported or in front of you, but actively support the jump with your arms (with momentum).
2-4 weight cuffs/1 weight waistcoat ► Make the exercise more difficult (additional weight)
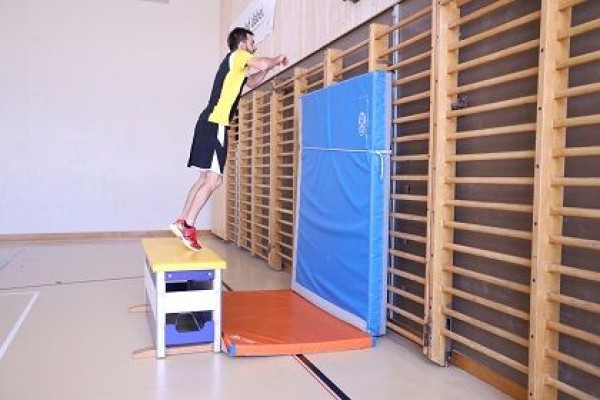
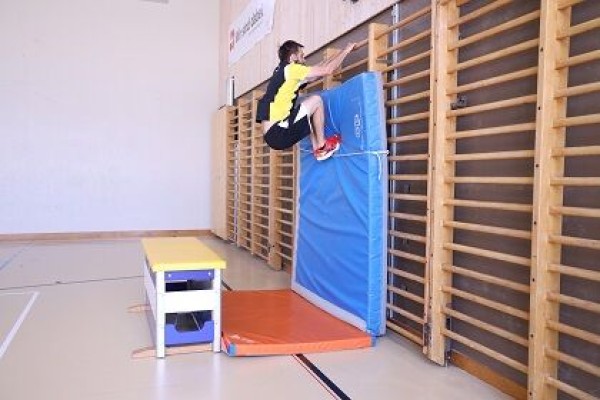
Jump to the slope I
Parkour
Individual work

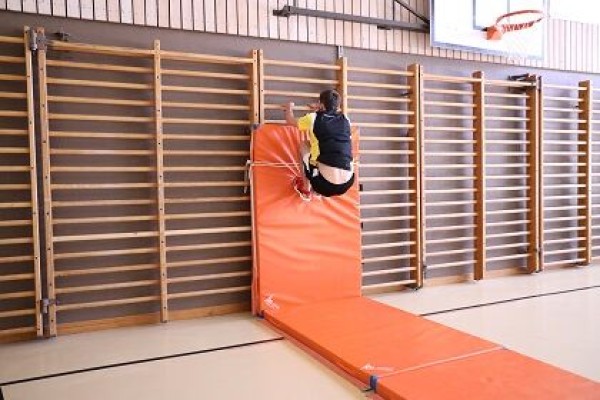
A straight run-up to the wall bars, frontal jump from a freely selectable distance, to cushion the impact, the feet first hit the soft mat attached to the wall, then immediately hold on to the wall bars with the hands.
outdoor I:
The participant takes a running start and jumps off in front of the wall, holds on to the wall and tries to overcome it.
Simplify: Just hold on to the wall and then let go again and land safely.
outdoor II:
The participant takes a running start, jumps off and holds on to the wall. The participant then tries to move along the wall in the hanging position. The knees are in front of the chest and the arms are outstretched. In order to move sideways, the front hand and the front leg must be moved simultaneously in the direction of movement.
1 wall bars ►indoor version
2 soft mats (small) ►indoor version
2 skipping ropes ►indoor version
Indoor post set-up:
Tie a set-up soft mat to the wall bars with skipping ropes, place a second soft mat on the floor in front of it.
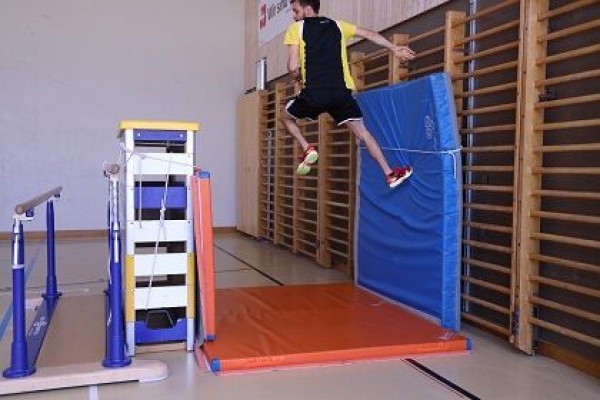
Jump to the slope II
Parkour
Individual work
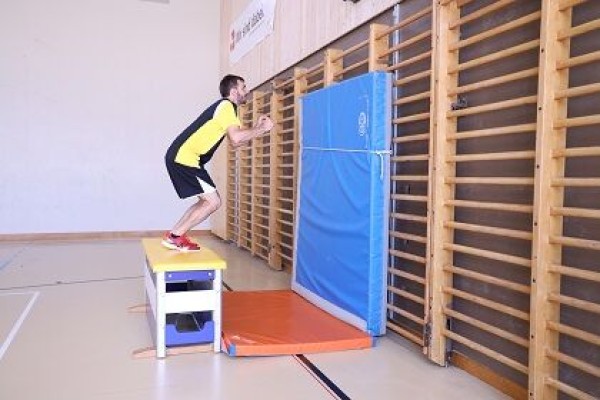
Both-legged jump from a standing position from the vaulting box, to cushion the impact first hit your feet on the soft mat attached to the wall, then immediately hold on to the wall bars with your hands.
Variant:
Execute the exercise from the movement with a straight run-up and frontal one-legged jump from the vaulting box.
1 wall bars
1 vaulting box
1 soft mat (medium-sized)
1 soft mat (small)
2 skipping ropes
Post set-up:
Tie a medium-sized soft mat with skipping ropes to the wall bars, place a small soft mat in front of the wall bars and a vaulting box (2-3 elements) behind it
Jump to the slope III
Parkour
Individual work

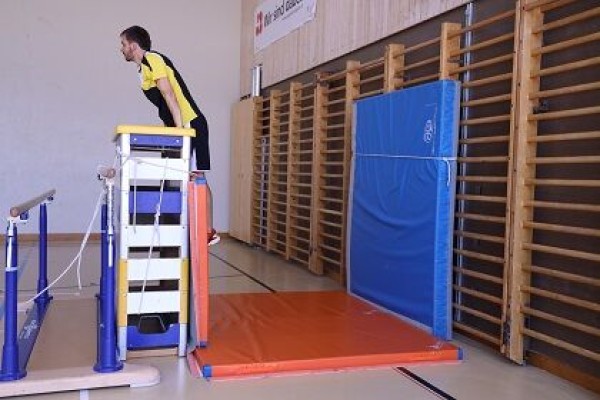
Hang on the wall bars with your back to the vaulting box, jump with a 180 degree turn to the slope on the vaulting box. To cushion the impact, first hit your feet on the soft mat, then support yourself with your hands on the vaulting box and climb up onto it.
1 wall bars
1 vaulting box
1 parallel bars
1 soft mat (medium)
1 soft mat (small)
6 skipping ropes
Post set-up:
Tie a set-up medium soft mat to the wall bars with skipping ropes, place a vaulting box (6-7 elements incl. top) approx. 150cm away and attach (e.g. using skipping ropes to a parallel bar). 150cm away, place a vaulting box (6-7 elements incl. top section) and attach it (e.g. to a parallel bar using skipping ropes), attach a small soft mat to the front of the vaulting box using skipping ropes.
Jump to the side
Power
Individual work
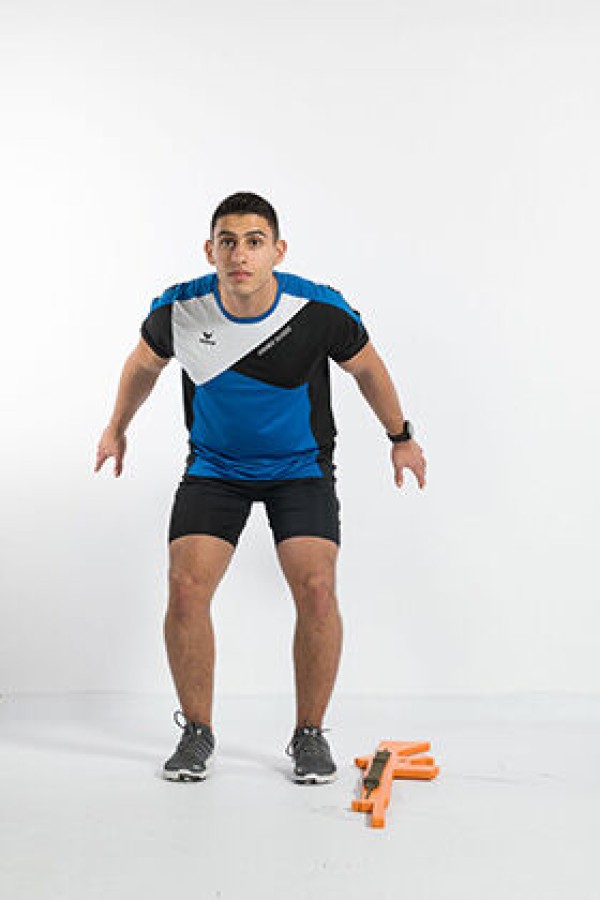

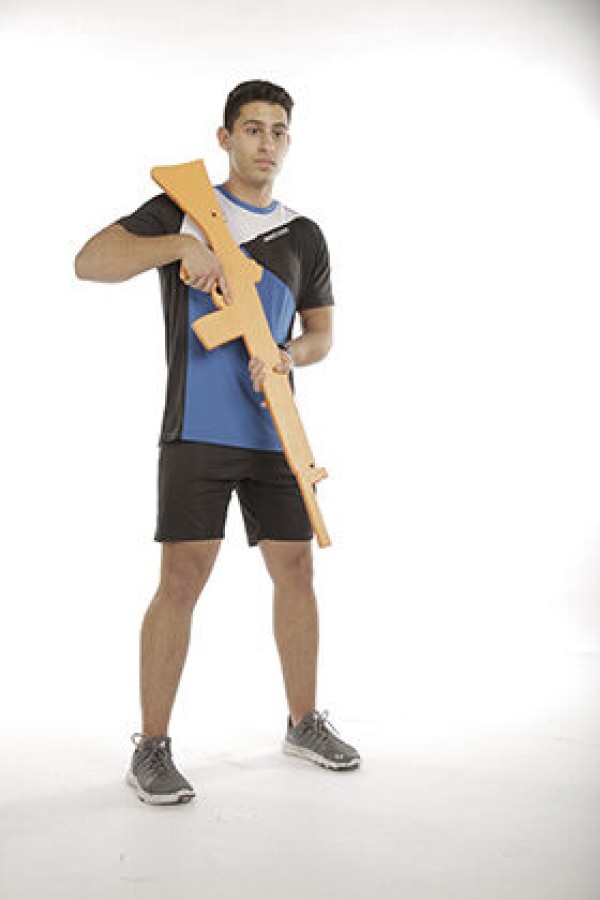
Assault rifle lying flat on the ground or placed on the bipod rest. Stand upright next to the weapon, facing in the direction of travel, and then perform two-legged jumps sideways over the rifle.
Lighten:
With the rifle resting on the bipod support, perform deeper jumps closer to the butt.
Harden:
Rifle placed on the bipod rest: perform higher jumps over the barrel.
Variant:
Launch/land with the leg facing away from the assault rifle (single-leg jumps).
1 assault rifle (neutralised)
One-legged jump to the side
Power
Individual work
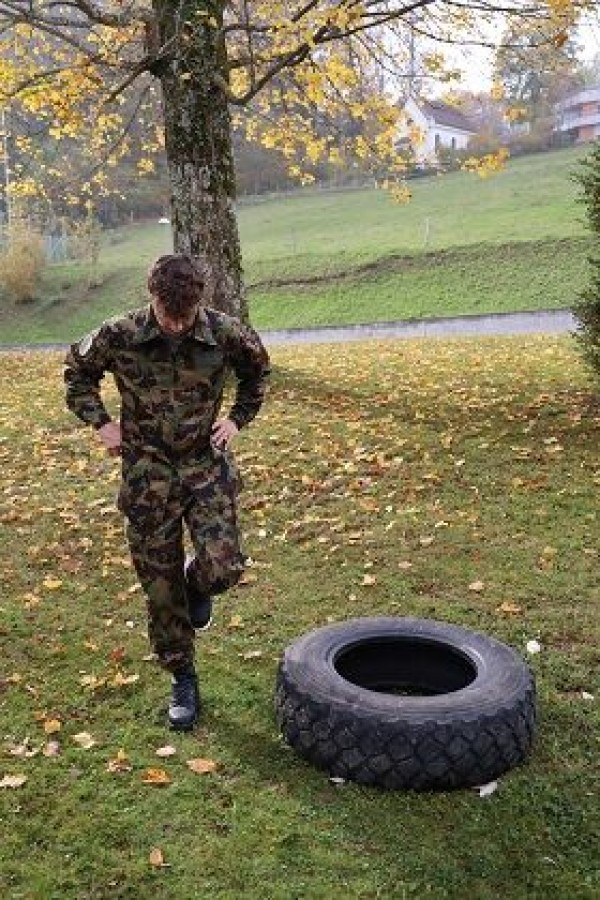
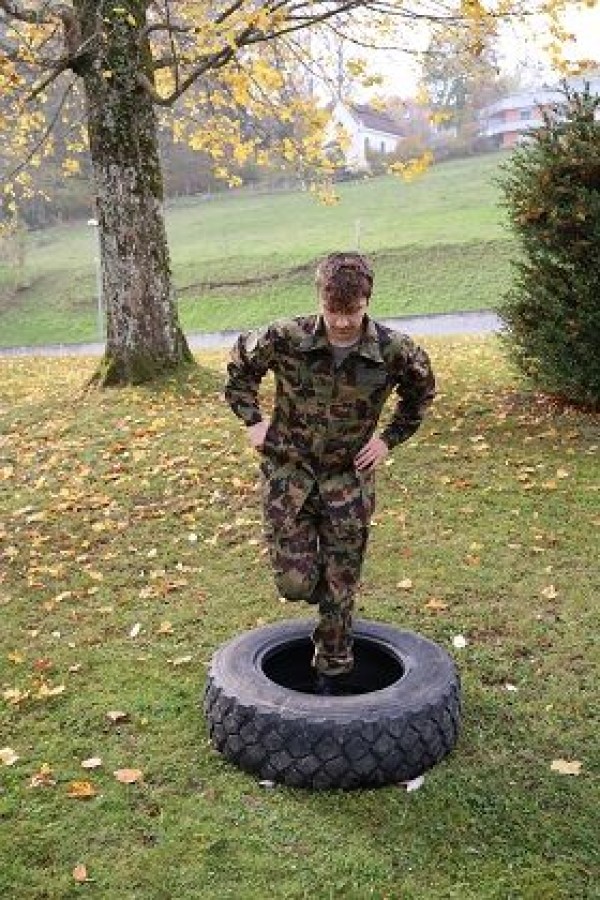
Stand on one leg outside the object (e.g. tyre) with the leg slightly bent. Tilt your upper body slightly forwards and jump onto the other leg inside the object and then jump back to the starting position.
Attention:
Risk of tripping.
Keep your knees stable and always behind your toes.
Lighten:
Jump without an object; jump over an object (e.g. combat backpack or helmet); lower cadence.
Harden:
Higher cadence; additional weight (on the feet).
1 tyre (10DM)
1 combat backpack/helmet ► make the exercise easier
2 weight cuffs/1 weight waistcoat ► make the exercise more difficult (additional weight)
One-legged jump to the side ► skater jump
Power
Individual work
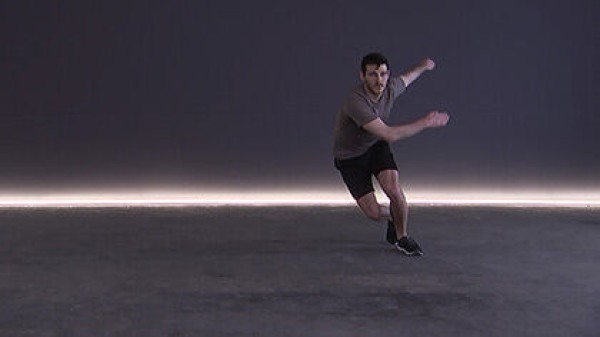

Stand on one leg with the leg slightly bent. Tilt your upper body forwards slightly and jump sideways onto the other leg. Hold your balance briefly in this position and then jump back to the other side.
Attention:
Keep your knees stable and always behind your toes.
Lighten:
Bend your knees less (greater angle); jump less to the side.
Harden:
Bend your knees more (smaller angle); hold additional weight (on your legs, shoulders, in front of your chest or in your hands).
2-4 weight cuffs/2 weight balls/dumbbells/1 weight vest/weight disc/sandbag/fighting rucksack ► Make the exercise more difficult (additional weight)
Jump roll from a standing position
Floor and apparatus gymnastics


Both legs jump from a standing position with a slight forward lean (centre of gravity in front of the feet), slightly bent posture (C+) with body tension in the flight phase, arms stretched out in a high hold, hands placed shoulder-width apart, arms bent, head pulled towards the chest when rolling down (resting on the neck), squatting and standing up (without using the hands).
Variant:
Jump roll over a vaulting box element or the crouching partner.
The participants practise the movement form independently using series of pictures or based on the demonstration of the exercise by the instructor. The instructor (or a partner) gives feedback, provides support and checks the correct execution.
4 soft mats (small) ► indoor version
1 row
outdoor:
turf field
Relay
Forms of play / exercises
Group work
4-5 participants per group
A runner carries a ball in their hands and runs around a turning point (e.g. colouring stick, marker cone or cone) or to the hall wall and back before sending the next runner onto the track. Several runs are chosen per participant with different forms of locomotion (e.g. normal sprint, one-legged hopping on the right and left leg, running backwards).
Replacements: Run to the end of the waiting group: pass the ball forwards over the heads of participants - pass the ball forwards between the legs - pass the ball alternately over the head and between the legs
.Per group:
2 colouring sticks
1 ball (volleyball, softball)
Relay
Forms of play / exercises
Group work
4-5 participants per group
One runner runs around a turning point (e.g. colouring stick, marker cone or cone) or to the hall wall and back before sending the next runner onto the course. The course can be completed as follows:
- Balancing the ball on the racket
- Juggling the ball with the racket
- Bouncing the ball on the floor
- Rolling/guiding the ball along the floor
Returns: From a defined line, a pass is played to the next participant in the group, who catches the ball with the racket without it falling to the ground (until successful or a maximum of three attempts) - run behind the group and pass the ball forwards between the legs - pass the ball behind the starting line with the racket (without hands).
Per group:
2 colouring sticks
1 Smolball
Per participant:
1 Smolball bat
Relay
Forms of play / exercises
Group work
4-5 participants per group
One runner jumps with the skipping rope around a turning point (e.g. painting stick, marker cone or cone) or to the hall wall and back before handing the skipping rope to the next runner and sending them on their way. There are different ways of moving with the skipping rope to complete the course:
Single run:
- Skipping rope: right leg first only (with/without intermediate step)
- Skipping rope: left leg first only (with/without intermediate step)
- Skipping rope: alternating right/left leg first (with/without intermediate step)
- Skipping rope: two-legged
- Skipping rope: one-legged left
- Skipping rope: one-legged right
- Skipping rope: walking backwards
- Skipping rope between the knees
Note: if you make a mistake, return to the start or turnaround, but after 3 mistakes you can continue jumping in place. The forms of locomotion can also be combined (e.g. outward one-legged left - return one-legged right, outward two-legged - return sprint without jumping rope).
Per group:
2 colouring sticks
1 skipping rope
Relay race
Basic training
Group work
Groups of 4
Relay race in teams of 4 in the arena: Each group appoints a starting runner who carries a handover stick/ribbon or similar. A runner from each team stands ready in each corner. The starting runner completes the first part of the course before handing over the baton/ribbon to the next runner, who in turn hands over the relay item to the next runner, etc. The starting runner has the task of handing over the baton/ribbon to the next runner. The starting runner has the task of counting how many times he/she has returned to the starting point in the specified time (number of laps). The sports director starts 2 runs of 9 minutes each with a break of 1-2 minutes between the runs (change of direction). The team goal for the second round is to complete more laps than in the first round.
Course: square (max. size of a football pitch). size of a football pitch)
Intensity level: 3 (medium)
HFmax: 80-90%
Speech rule: speak in full sentences
Variant:
The participants run at different speeds (e.g. participant A: intensity 3; participant B: intensity 2).
4 marking cones/caps
1 handover stick/tape
Sports manager:
1 stopwatch
Standing and prone position alternating
Power
Individual work


From the standing position, assume the prone position freely, observing the correct stance (see regulation 53.103: bend both knees simultaneously; kneel on the line of the hips; bend the upper body forwards and catch it with the weak hand; lie down without the weapon touching the ground, weapon and body form a line). Then stand up (reverse sequence of movements) and return to the standing position.
Attention:
The weapon is always pointed forwards.
1 pistol (neutralised)
Standing and prone position alternating
Power
Individual work


From the standing position, assume the prone position freely, observing the correct stance (see regulation 53.096: bend both knees simultaneously; kneel on the line of the hips; bend the upper body forwards and catch it with the weak hand; lie down so that the weapon and the body form a line). Then stand up (reverse movement sequence) and return to the standing position.
Attention:
The weapon is always pointed forwards.
1 assault rifle (neutralised)
Alternating standing and crouching position
Power
Individual work


From the standing position, assume the crouching position, observing the correct stance (see regulation 53.096: bend both knees evenly, squat down; place feet flat on the ground; strike the weapon; both elbows are placed in front of the knees; the body is tilted slightly forwards). Then straighten up by stretching your legs and return to the standing position.
Attention:
The weapon is always pointed forwards.
1 assault rifle (neutralised)
Standing and kneeling position alternating
Power
Individual work


From the standing position, take up the position kneeling (on one knee), observing the correct stance (see regulation 53.103: take a step forwards with the weak leg over an imaginary line pointing from the tip of the strong foot to the target; bend both knees simultaneously; sit on the strong heel; bend the strong knee 45° from the direction of the shot; rest the weak elbow in front of or behind the weak knee). Then stand up by pushing off the front foot and return to the standing position.
Attention:
Weapon is always pointed forwards.
1 pistol (neutralised)
Standing and kneeling position alternating
Power
Individual work

From the standing position, assume the kneeling position, observing the correct stance (see regulation 53.096: take a step forward in front of the strong leg with the weak leg, crossing the imaginary line from the strong leg to the target; bend both knees simultaneously, sit on the strong heel; the strong knee is bent 45 degrees from the direction of the shot; support the weak elbow slightly in front of or behind the weak knee). Then stand up by pushing off the front foot and return to the standing position.
Attention:
The weapon is always pointed forwards.
1 assault rifle (neutralised)
Standing and kneeling alternately
Power
Individual work


From the standing position, assume the kneeling position (on both knees), observing the correct stance (see regulation 53.103: starting position is the standing position; straighten the back and bend both knees at the same time; go to the ground with both knees). Then return to the standing position.
Attention:
The weapon is always pointed forwards.
1 pistol (neutralised)