Exercises (2330)
Swivel squat I
Parkour
Individual work


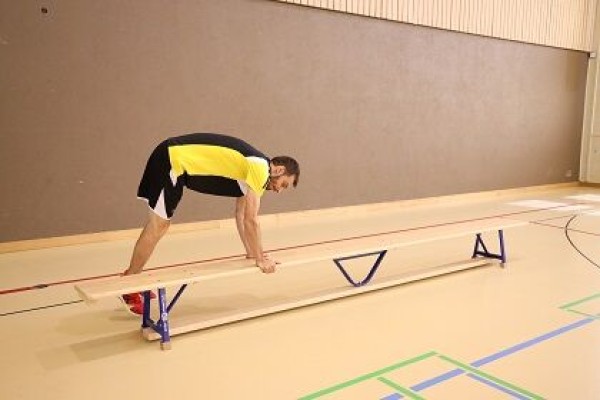

Stand on one side of the long bench, hold on to the edges of the wide side of the long bench with your hands, jump over the bench in as high a squat as possible (squat turn), land on the other side of the long bench.
Variant:
Place balls on the long bench, over which the legs must be guided.
1 long bench
2-3 medicine balls ► Variation of the exercise
Swivel squat II
Parkour
Individual work

Slow run-up, place your hands on the top of the vaulting box (the upper hand points horizontally in the direction of the jump, the lower hand points towards the ground), jump over the vaulting box with your legs drawn up (squat turn), landing on both legs on a small soft mat.
Variant:
Set up the top of the vaulting box more firmly (e.g. on a wall bar).
1 vaulting box
2 soft mats (small)
1 wall bars ► Variation of the exercise
Post setup:
The top element is leant against the vaulting box at an angle, with small soft mats on both sides.
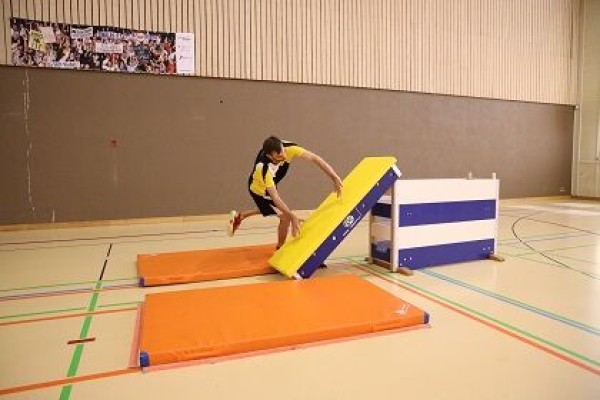
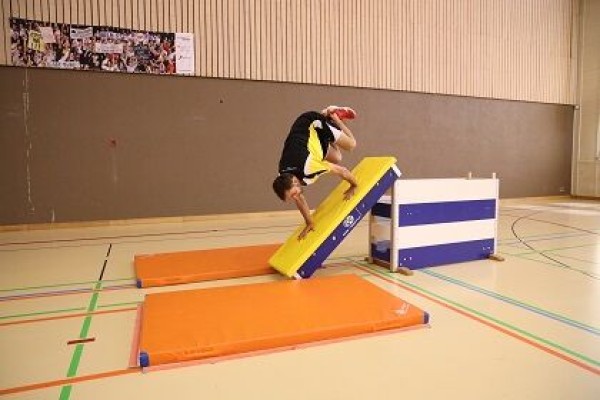
Swivel squat III
Parkour
Individual work
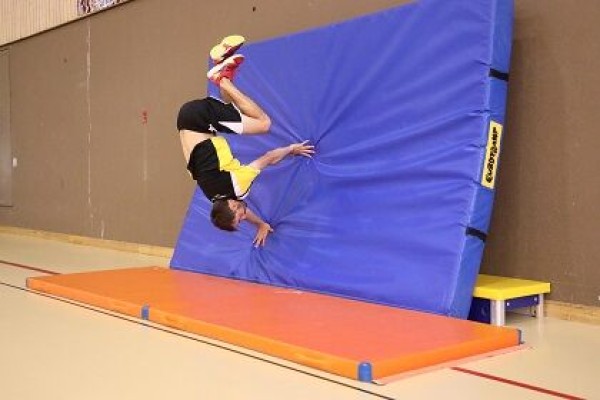

Approach the large soft mat at a 45-degree angle, place your hands in the centre of the mat (the upper hand points horizontally in the direction of the jump, the lower hand points towards the floor), jump with both legs and bring your legs tucked over your body to the other side (squat turn), land with both legs.
Variant:
Increase/decrease the angle of the large soft mat.
1 wall
1 vaulting box
1 soft mat (large)
1 soft mat (small)
Post setup:
Place the large soft mat at an angle against a wall and stabilise with vaulting box elements (i.e. place behind the mat), place the small mats in a row in front of the large soft mat.
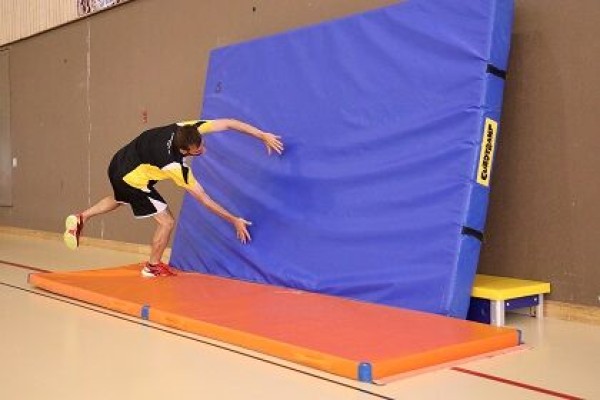
Swivel squat IV
Parkour
Individual work
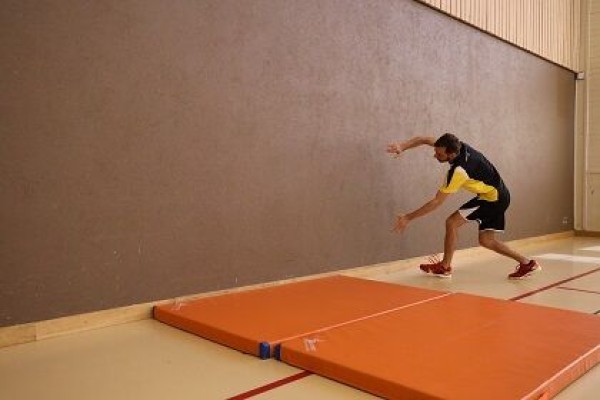
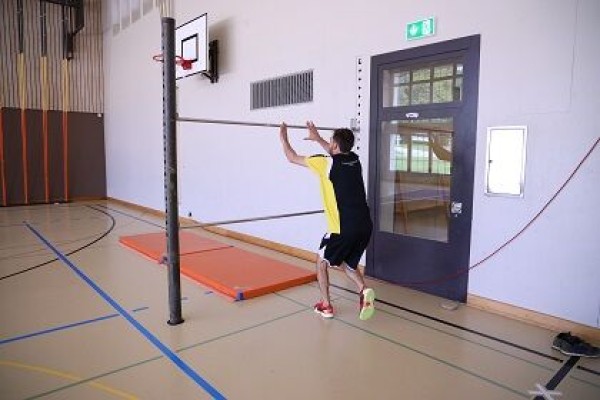
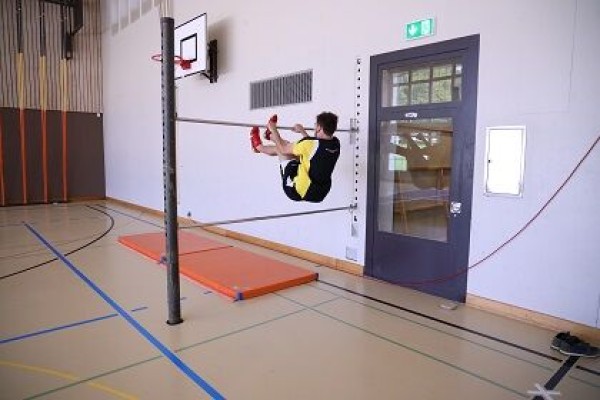
Approach the wall at a 45 degree angle, jump off with both legs, grab the wall with your hands (the upper hand points horizontally in the direction of the jump, the lower hand points towards the floor), pull your legs over your head to the other side (squat turn), land with both legs.
1 wall
1-2 soft mats (small)
Post setup:
Place soft mats on the floor in front of a wall.
Dribble artist
Coordination exercises
Individual work

Bounce two balls on the floor at the same or opposite time. After ten repetitions without interruption, switch to bouncing against the wall.
► Differentiation ability
1 wall
2 basketballs
Dribble artist
Coordination exercises
Individual work
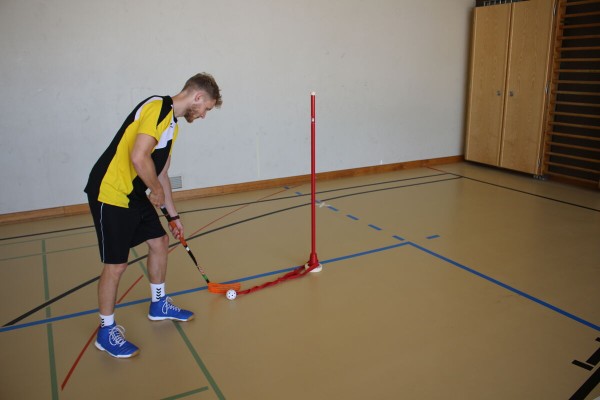
The participant uses the floorball stick to hit the ball clockwise and anti-clockwise around the stake with forehand and backhand strokes.
Variant:
If the ball is only attached with a ribbon (shorter pendulum), the exercise becomes more difficult.
►Rhythmisation skills, reaction skills
1 stake
2 game ribbons
1 floorball stick
1 floorball ball
Post setup:
A floorball ball attached to two linked game ribbons is placed loosely around a stake.
Dribble artist
Coordination exercises
Partner work
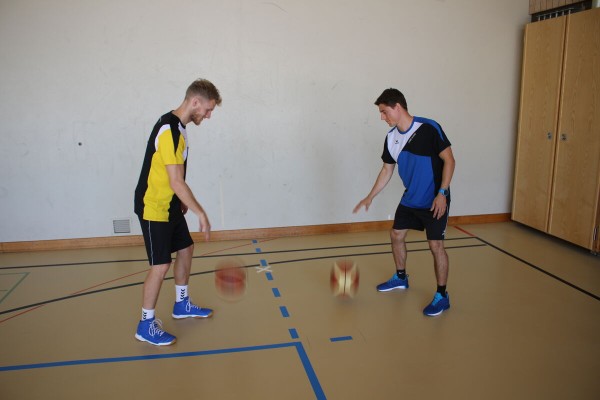
One participant bounces a rhythm with the (basket)ball, the second participant tries to copy the rhythm at the same time.
Variant I:
The imitator bounces twice or half as fast.
Variant II:
Perform the exercise alone with two (basket)balls, bouncing with one hand twice as fast as the other.
► Rhythm skills
2 basketballs
Dribble artist
Coordination exercises
Individual work
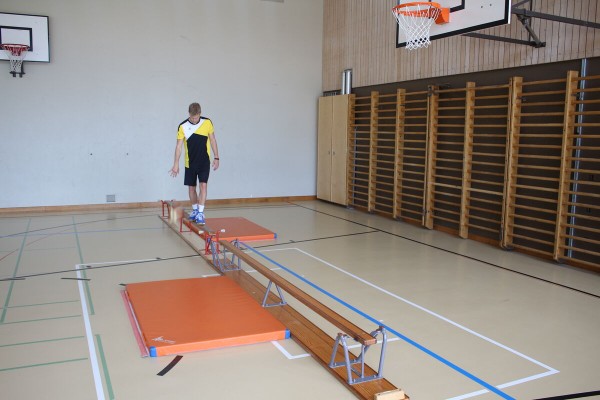
The participant runs across the narrow side of two long benches set up one behind the other and bounces a basketball. In the centre of the two long benches, the side on which the basketball is bounced is changed. Alternatively, or to make the exercise more difficult, two basketballs can be bounced at the same time.
Variant:
Small mats on the floor can make the exercise more difficult, as the side of the bounce must be changed (only possible with one basketball bouncing).
►Balance ability, differentiation ability
2 long benches
2 soft mats (small)
1-2 basketballs
Post set-up:
Place two long benches one behind the other with the narrow side facing up. Place a small soft mat next to each bench (on opposite sides).
Duel
Coordination exercises
Individual work
Two participants stand on the same slackline at the same time and try to stay up longer than their opponent. Who has 5 points first?
Easing:
Another participant sits in the centre of the slackline.
Heavier:
The participants each hold one end of a skipping rope and try to unbalance the other by pulling; the participants try to unbalance each other with a foam club or a foam ball.
1 Slackline
Dunking
Coordination exercises
Individual work

The participants jump onto the mini trampoline with the basketball in their hands and try to sink the ball into the basket with a basketball shot or even a "dunk".
► Rhythmisation skills, differentiation skills, orientation skills
1 mini-trampoline
1-2 soft mats (large)
4-6 soft mats (small)
1 basketball
Post set-up:
Place the large soft mat(s) under a basketball hoop and set up a mini-trampoline in front of it. For additional safety, place small soft mats around the large soft mat(s).
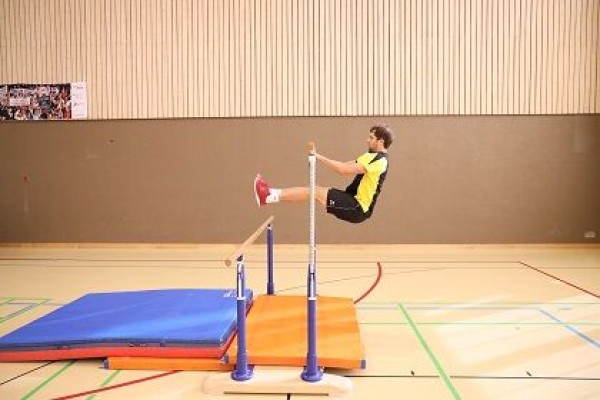
Swing through I
Parkour
Individual work
Squat on the lower horizontal bar, hold on to the upper bar with both hands, swing through between the two horizontal bars to land on the soft mat behind.
Variant:
Roll off after landing.
outdoor:
Stand on the front of the bar. Hold the pole with both hands. Swing under the (horizontal) bar to land on the other side.
1 horizontal bar ►indoor version
1 additional horizontal bar ►indoor version
2 soft mats (small) ►indoor version
Indoor pole assembly:
Fix two horizontal bars at different heights (approx. 1m apart).
outdoor:
1 pole
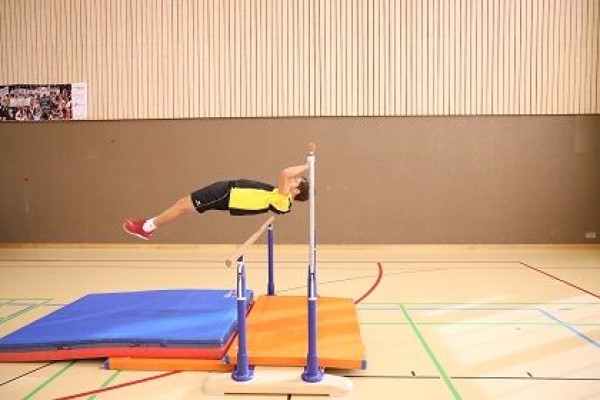
Swing through II
Parkour
Individual work

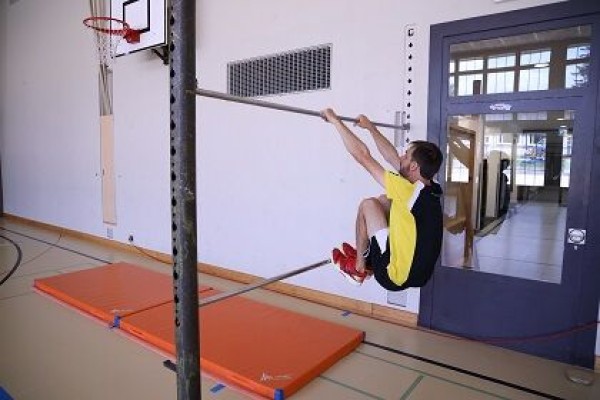
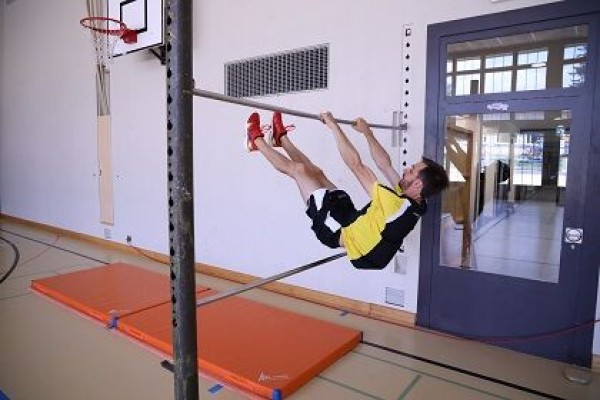
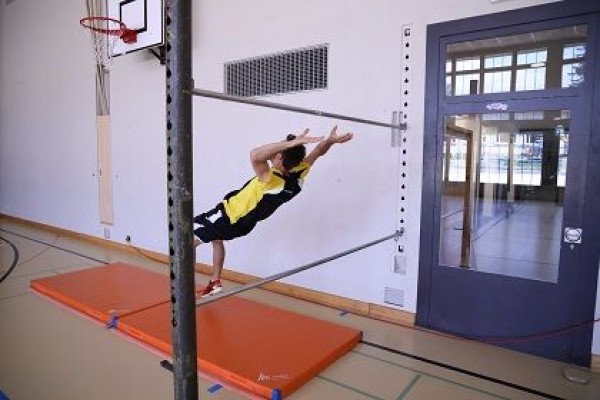
Frontal run-up and two-footed jump, hold on to the upper horizontal bar with both hands and swing between the two bars (underswing), two-legged landing on the other side (soft mat behind it ►indoor variation).
Variants:
Vary the height of the horizontal bars;
roll off after landing.
1 horizontal bar ►indoor version
1 additional horizontal bar ►indoor version
2 soft mats (small) ►indoor version
Indoor post setup:
Fix two horizontal bars at different heights (approx. 1m apart).
outdoor:
1 (horizontal) bar
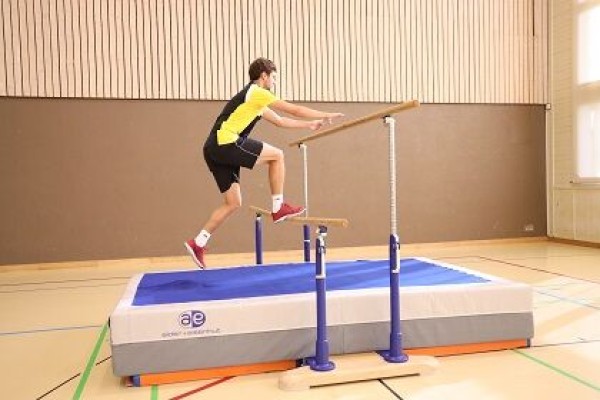
Jump through I
Parkour
Individual work
Stand on the low side of the uneven bars and hold on to the higher bars with your hands. Jump off with both legs for a squat turn over the high bars, landing on the small soft mat.
Variant:
Change the height of the bars.
1 parallel bars
1 soft mat (large)
1 soft mat (small)
Post setup:
Fix the parallel bars at different heights (distance: approx. 50 cm), place a small soft mat under the parallel bars and a large soft mat behind it.
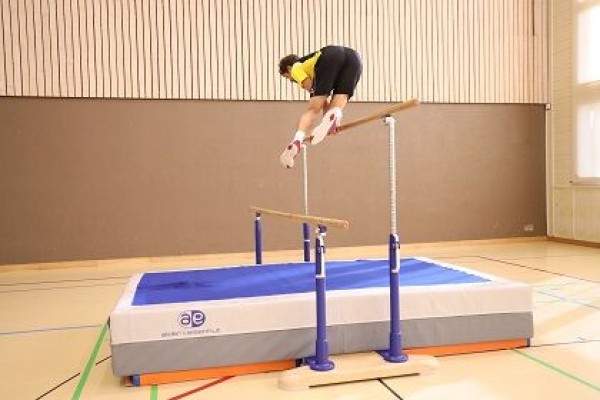
Jump through II
Parkour
Individual work
Frontal approach to the uneven bars (front: high bars), hold on to the upper bars and swing through the uneven bars (underswing). Land on the large soft mat.
Variant:
Increase/decrease the distance between the bars (both vertically and horizontally).
1 parallel bars
1 soft mat (large)
1 soft mat (small)
Post setup:
Fix the parallel bars at different heights (distance: approx. 50 cm), place a small soft mat under the parallel bars and a large soft mat behind it.
Jump through III
Parkour
Individual work
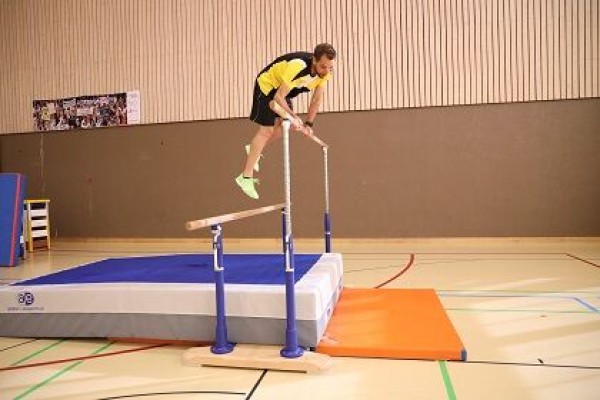
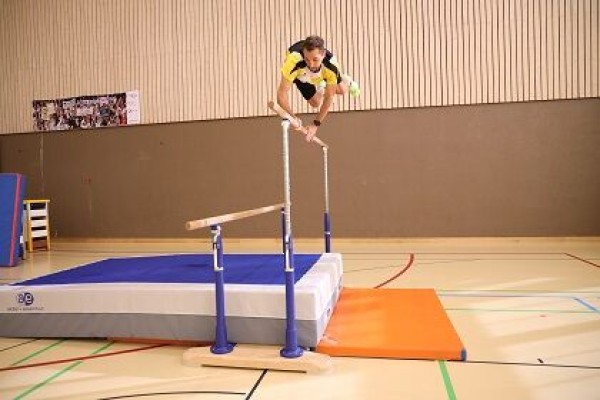
Frontal run-up to the uneven bars (front: low bars), jump onto the low bars, squat turn over the high bars (180 degree turn), landing with the feet on the low bars, hands still holding the high bars.
Variant:
Exit with underswing between the two bars without a support.
1 parallel bars
1 soft mat (large)
Post setup:
Fix the parallel bars at different heights (distance: approx. 50cm), place a large soft mat under the parallel bars.
Move one leg backwards in an alternating squat position
Power
Individual work


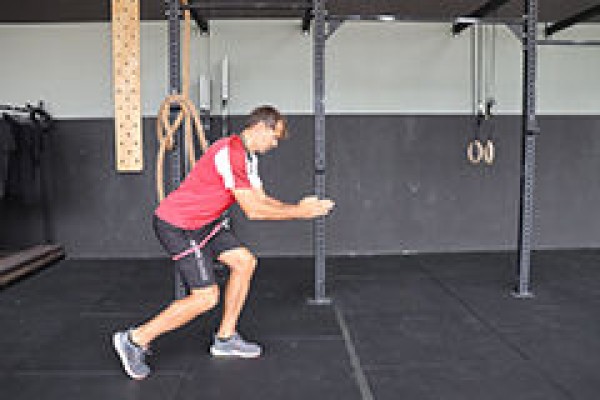
Get into a squat position (deep squat), alternating between moving one leg backwards (toes touching the floor behind the body) and back to the starting position.
Attention:
The starting position in the squat position always remains stable/unchanged.
Lighten:
Move your leg less far back.
Harden:
Tighten an elasticated band between your legs (mid-thigh height).
No material required
1 elasticated rubber band ► to make the exercise more difficult
Move one leg backwards in an alternating squat position
Power
Individual work

Knee bend position (deep squat) with an elasticated band stretched between the legs (mid-thigh height), alternate between moving one leg backwards (toes touching the floor behind the body) and back to the starting position.
Attention:
The starting position in the squat position always remains stable/unchanged.
Lighten:
Select an elastic band with less resistance.
Harden:
Select an elastic band with greater resistance.
1 elasticated rubber band
Move one leg backwards in a squat position alternating ► monster walk (backwards)
Power
Individual work
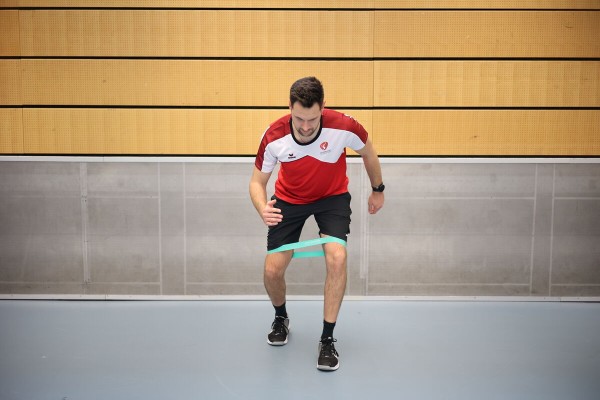
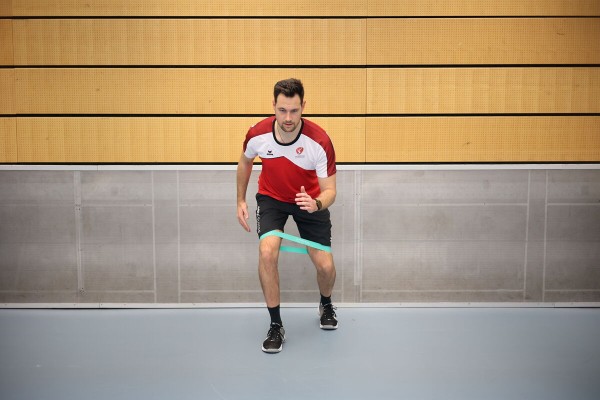
Get into a squat position (deep squat) with an elasticated band stretched between the legs (slightly above the knees), alternate between positioning one leg backwards (foot completely off the ground) and returning to the starting position.
Attention:
The starting position in the squat position always remains stable/unchanged.
Lighten:
Select an elastic band with less resistance.
Harden:
Select an elastic band with greater resistance.
1 mini-band
Move one leg backwards in squat position and stretch jump alternately
Power
Individual work
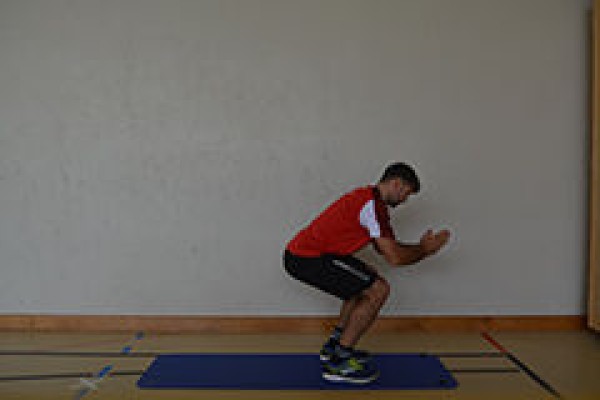


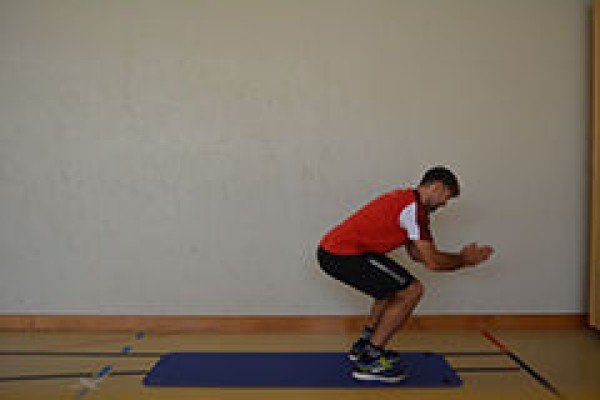
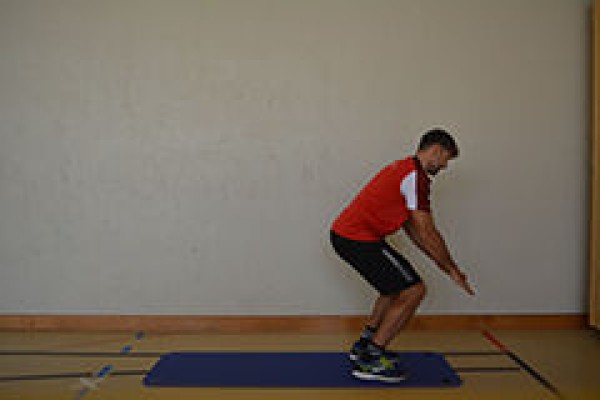
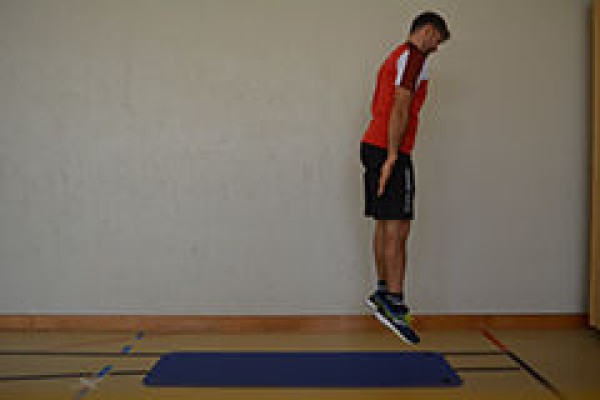
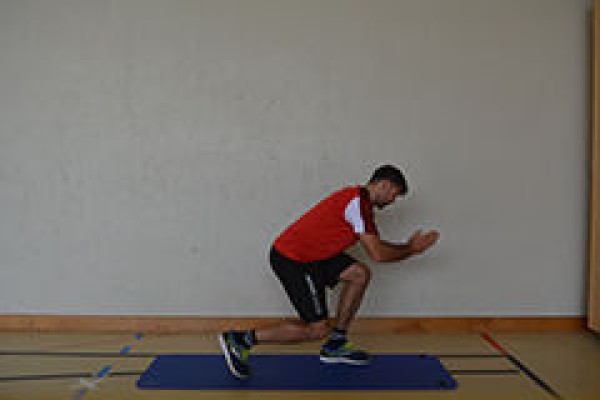
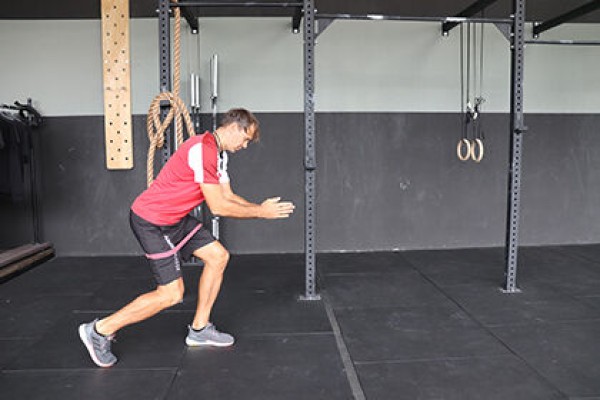
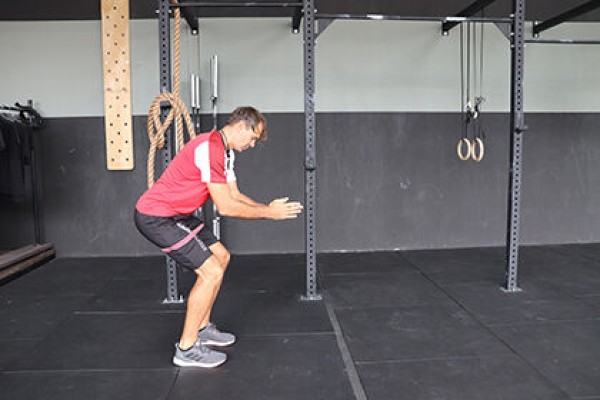
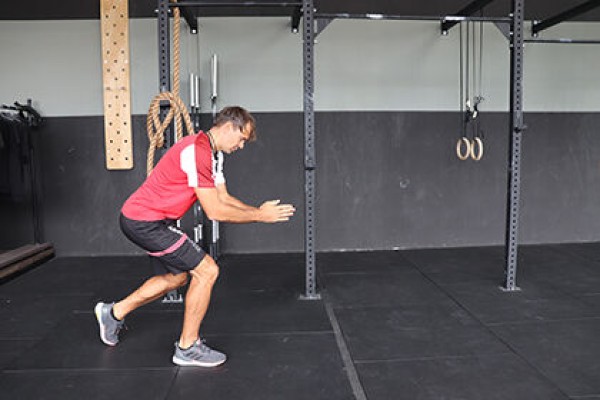
Squat position (deep squat) with arms bent in front of you (palms pressed against each other), alternately move one leg backwards (toes touching the floor behind the body) and back to the starting position, then perform a stretch jump (simultaneously stretch the arms and move them behind the body, palms facing backwards) and return to the starting position (squat position) to start the exercise from the beginning.
Attention:
Starting position in the squat position remains stable/unchanged when moving the leg backwards.
Lighten:
Move the leg less far backwards; stretch jump less high.
Harden:
Tighten an elastic band between the legs.
No material required
1 elasticated rubber band ► to make the exercise more difficult
Move one leg backwards in squat position and stretch jump alternately
Power
Individual work


Squat position (deep squat) with arms bent in front of you (palms pressed against each other), with an elasticated rubber band stretched between your legs (mid-thigh height), alternately move one leg backwards (toes touching the floor behind the body) and back to the starting position, then perform a stretch jump (simultaneously stretch your arms and bring them behind your body, palms facing backwards) and return to the starting position (squat position) to start the exercise again.
Attention:
The starting position in the squat position remains stable/unchanged when moving the leg backwards.
Lighten:
Move the leg less far backwards; stretch jump less high; choose an elastic band with less resistance.
Harden:
Choose an elastic band with greater resistance.
1 elasticated rubber band
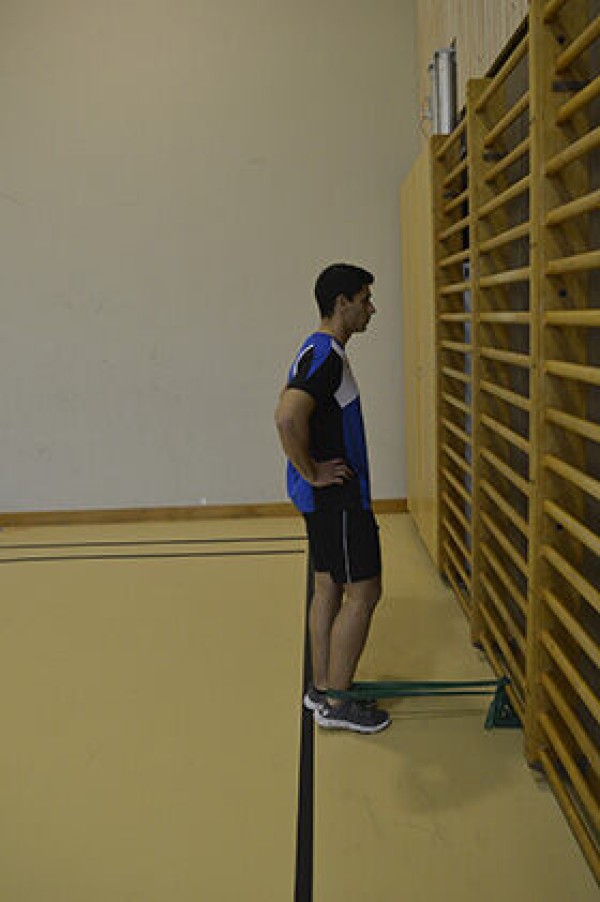
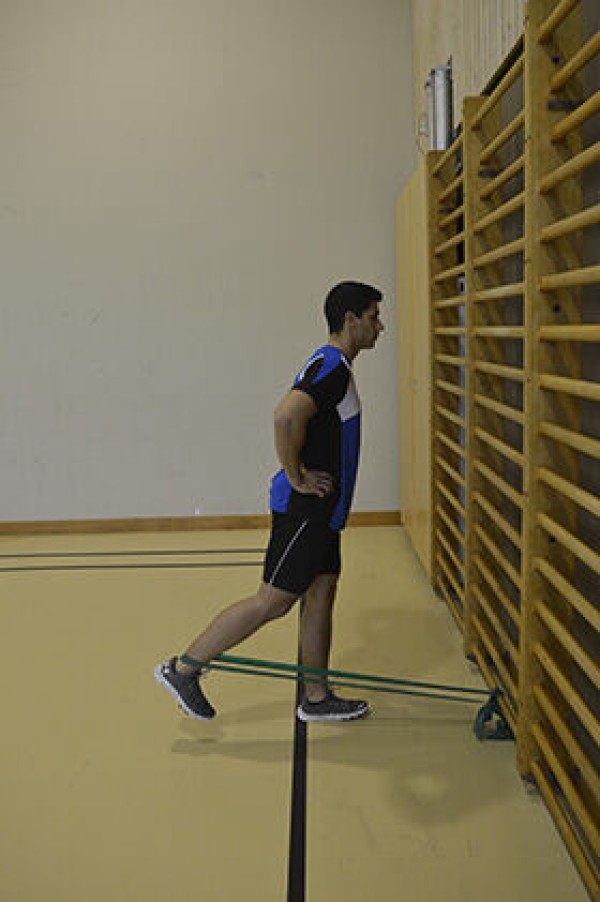
Move one leg backwards and back in single-leg stance (left) ► kick-back
Power
Individual work
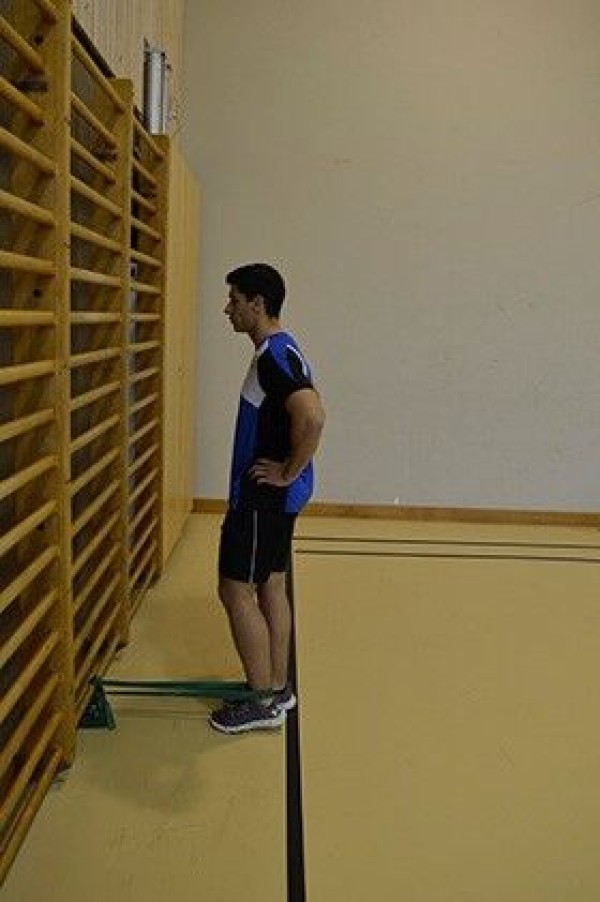
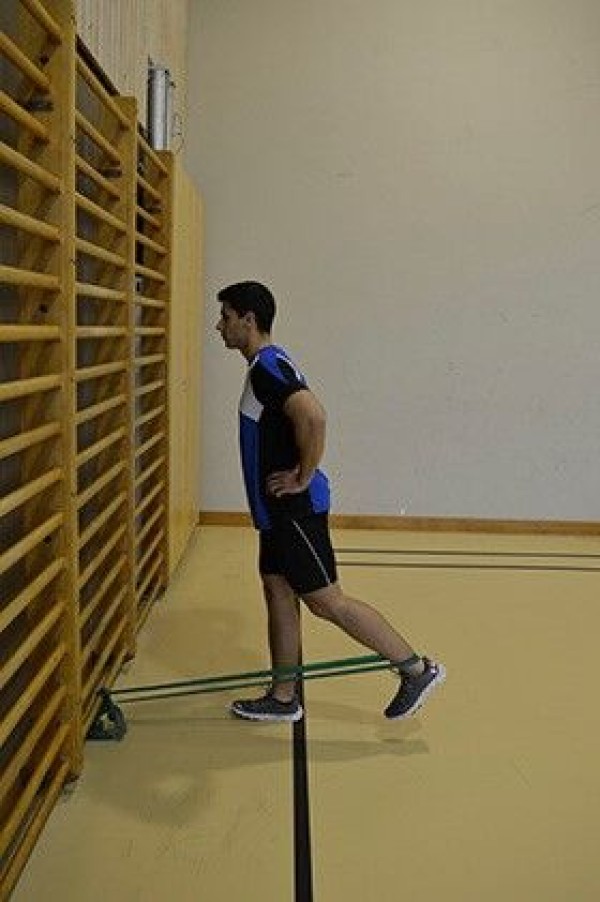
One-legged stand (right), upright position facing the wall bars (or e.g. a tree), tie the elastic band into a loop at ankle height on the wall bars (on the tree), step into the loop with the training leg (left), bend the leg slightly (lifted off the floor) backwards and return to the starting position.
Attention:
The upper body remains stable (arms can support themselves on the wall bars/tree).
Lighten:
Choose a rubber band with less resistance.
Harden:
Choose a rubber band with greater resistance.
1 elasticated rubber band
1 wall bar/tree
Move one leg backwards and back in single-leg stance (left) ► kick-back
Power
Individual work


Stand on one leg (right), with the free leg (left) only slightly raised off the floor, the body position is upright, stretch an elasticated band between the legs (place the band around the ankles). From this position, move the training leg (left) backwards (one-sided hip flexion), leaning the upper body slightly forwards. Then bring the leg and upper body back to the starting position.
Faciliter:
Choose an elastic band with less resistance.
Compliquer:
Choose an elastic band with greater resistance.
1 mini-band
Move one leg backwards and back in single-leg stance (right) ► kick-back
Power
Individual work
One-legged stand (left), upright position facing the wall bars (or e.g. a tree), tie the elastic band into a loop at ankle height on the wall bars (on the tree), step into the loop with the training leg (right), bend the leg slightly (lifted off the floor) backwards and return to the starting position.
Attention:
The upper body remains stable (arms can support themselves on the wall bars/tree).
Lighten:
Choose a rubber band with less resistance.
Harden:
Choose a rubber band with greater resistance.
1 elasticated rubber band
1 wall bar/tree
Move one leg backwards and back in single-leg stance (right) ► kick-back
Power
Individual work


Stand on one leg (left), with the free leg (right) only slightly raised off the floor, the body position is upright, stretch an elasticated band between the legs (place the band around the ankles). From this position, move the training leg (right) backwards (one-sided hip flexion), leaning the upper body slightly forwards. Then return the leg and upper body to the starting position.
Lighten:
Choose an elastic band with less resistance.
Harden:
Choose an elastic band with more resistance.
1 mini-band
Move one leg forwards in a squat position alternating ► monster walk (forwards)
Power
Individual work


Get into a squat position (deep squat) with an elasticated band stretched between the legs (slightly above the knees), alternate between positioning one leg forwards (foot completely off the ground) and returning to the starting position.
Attention:
The starting position in the squat position always remains stable/unchanged.
Lighten:
Select an elastic band with less resistance.
Harden:
Select an elastic band with greater resistance.
1 mini-band